
User Manual
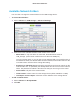
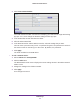
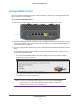
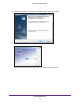
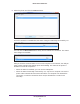
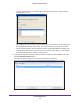
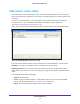
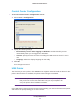
Table Of Contents
- R6250 Smart WiFi Router
- Contents
- 1. Hardware Setup
- 2. Getting Started
- 3. NETGEAR genie Basic Settings
- 4. NETGEAR genie Advanced Home
- 5. USB Storage
- 6. ReadySHARE Printer
- 7. Security
- Keyword Blocking of HTTP Traffic
- Block Services (Port Filtering)
- Port Triggering to Open Incoming Ports
- Port Forwarding to Permit External Host Communications
- How Port Forwarding Differs from Port Triggering
- Set Up Port Forwarding to Local Servers
- Set Up Port Triggering
- Schedule Blocking
- Security Event Email Notifications
- 8. Administration
- 9. Advanced Settings
- 10. Troubleshooting
- A. Supplemental Information
- B. Notification of Compliance

ReadySHARE Printer
55
R6250 Smart WiFi Router
ReadySHARE Printer
You can connect a USB printer to the router’s USB port, and share it among Windows and
Mac computers on the network.
To set up ReadySHARE Printer:
1. Connect the USB printer to the router
’s USB port with a USB printer cable.
2. Install the USB printer driver software on each computer that will share the printer. If you do
not have the printer driver, contact the printer manufacturer to find and download the most
recent printer driver software.
3. On each computer that will share the printer
, download the NETGEAR USB Control Center
utility.
The NETGEAR USB utility has a Mac version and a Windows version, which you can
access in two dif
ferent ways:
• From the ReadySHARE Printer area of the page you access through this URL:
www.netgear.com/readyshare
• From the ReadySHARE tab of the NETGEAR genie app. (See NETGEAR genie App
and Mobile genie App on page 18.)
Note: You have to install this utility before you can use the ReadySHARE
Printer feature. For the ReadySHARE Printer feature to work, this
utility has to be running in the background.