
User Manual
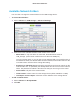
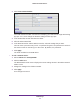
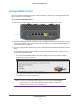
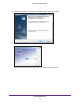
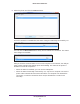
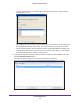
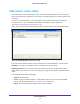
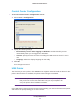
Table Of Contents
- R6250 Smart WiFi Router
- Contents
- 1. Hardware Setup
- 2. Getting Started
- 3. NETGEAR genie Basic Settings
- 4. NETGEAR genie Advanced Home
- 5. USB Storage
- 6. ReadySHARE Printer
- 7. Security
- Keyword Blocking of HTTP Traffic
- Block Services (Port Filtering)
- Port Triggering to Open Incoming Ports
- Port Forwarding to Permit External Host Communications
- How Port Forwarding Differs from Port Triggering
- Set Up Port Forwarding to Local Servers
- Set Up Port Triggering
- Schedule Blocking
- Security Event Email Notifications
- 8. Administration
- 9. Advanced Settings
- 10. Troubleshooting
- A. Supplemental Information
- B. Notification of Compliance

USB Storage
52
R6250 Smart WiFi Router
3. Click Create Network Folder.
If the Add a Network Folder screen does not display, your web browser might be blocking
pop-ups. If it is, then change the browser settings to allow pop-ups.
4. In the Folder field, browse and select the folder.
5. Fill in the Share Name field.
6. In the Read
Access list and the Write Access list, select the setting that you want.
The user name (account name) for All – no password is guest. The password for admin is
the same one that is used to log in to the router. By default, it is password.
7. Click Apply.
The folder is added on the USB device.
To edit a network folder:
1. Select Advanced > ReadySHARE.
2. Click the Edit button.
The Edit Network Folder screen displays the same settings shown in the Add a Network
Folder screen.
3. Change the settings in the fields as needed.
4. Click Apply.
Your changes are saved.