
User Manual


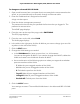

Table Of Contents
- Contents
- 1. Hardware
- 2. Install and Access the Switch in Your Network
- 3. Optimize the Switch Performance
- 4. Use VLANS for Traffic Segmentation
- 5. Manage the Switch in Your Network
- 6. Maintain and Monitor the Switch
- Update the firmware on the switch
- Manage the configuration file
- Return the switch to its factory default settings
- Control access to the device UI
- HTTP and HTTPS management access
- Change or lift access restrictions to the switch
- Manage the DoS prevention mode
- Manage the power saving mode
- Control the port LEDs
- Change the switch device name
- View system information
- Date and time settings
- View switch connections
- View the status of a port
- Power over Ethernet
- 7. Diagnostics and Troubleshooting
- 8. Factory Default Settings and Technical Specifications
- A. Additional Switch Discovery and Access Information

assign a different VLAN to a port, manage port PVIDs, and manage a voice VLAN,
including the OUI table.
For more information about advanced 802.1Q VLANs, see the following sections:
• Activate the advanced 802.1Q VLAN mode
• Create an advanced 802.1Q VLAN
• Change an advanced 802.1Q VLAN
• Specify a port PVID for an advanced 802.1Q VLAN
• Set an existing advanced 802.1Q VLAN as the voice VLAN and adjust the CoS value
• Change the OUI table for the voice VLAN
• Delete an advanced 802.1Q VLAN
Activate the advanced 802.1Q VLAN mode
By default, all types of VLANs are disabled on the switch.
When you activate the Advanced 802.1Q VLAN mode, VLAN 1 is added to the switch
and all ports function as untagged members of VLAN 1. This is the default VLAN in the
Advanced 802.1Q VLAN mode.
In an advanced 802.1Q VLAN configuration, you can set up VLANs to which you can
add tagged or untagged ports. Port tagging allows a port to be associated with a
particular VLAN and allows the VLAN ID tag to be added to data packets that are sent
through the port. The tag identifies the VLAN that must receive the data. You can also
manage the VLAN IDs (PVIDs) of the ports (see Specify a port PVID for an advanced
802.1Q VLAN on page 50).
To activate the Advanced 802.1Q VLAN mode and manage port tagging for the
default VLAN:
1.
Open a web browser from a computer that is connected to the same network as the
switch, or connected directly to the switch through an Ethernet cable.
2. Enter the IP address that is assigned to the switch.
A login window opens.
3. Enter the device management password.
The password is the one that you specified the first time that you logged in. The
password is case-sensitive.
The HOME page displays.
4.
From the menu at the top of the page, select SWITCHING.
The QOS page displays.
5.
From the menu on the left, select VLAN.
The VLAN page displays.
User Manual46Use VLANS for Traffic
Segmentation
8-port Ultra60 PoE++ Multi-Gigabit (2.5G) Ethernet Plus Switch