
User Manual


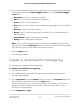
Table Of Contents
- Contents
- 1. Getting Started with the AV UI
- 2. Audio-Video Profile Templates and Network Profiles
- 3. Link Aggregation
- 4. Power over Ethernet
- 5. Security
- 6. Manage and Monitor the Switch
- Licenses
- Update the firmware
- Startup configuration
- Date and time settings
- Add a system name
- Set the STP bridge priority for the switch
- Restart the switch from the AV UI
- Reset the switch to factory default settings
- Manually control the fans
- Display the status of the ports and switch
- Display the neighboring devices
- 7. Diagnostics and Troubleshooting

Manage the switch log, console log, and
command log
The switch generates messages in response to events, faults, and errors as well as
changes in the configuration or other occurrences. These messages are stored locally
and can be forwarded to one or more centralized points of collection for monitoring
purposes or long-term archival storage. Local and remote configuration of the logging
capability includes filtering of messages logged or forwarded based on severity and
generating component.
To configure a syslog server and set up remote logging, use the main UI or the CLI. For
more information, see the main user manual or the CLI command reference manual,
both of which you can download by visiting netgear.com/support/download.
By default, the switch log is enabled at the Notice logging level but the console log and
command log are disabled.
To manage the switch log, console log, and command log that are stored locally:
1. Launch a web browser.
2.
In the address field of your web browser, enter the IP address of the switch.
The login page displays.
3.
In the Login Name field, enter admin as the user name, in the Password field, enter
your local device password, and click the Login button.
The first time that you log in, no password is required. However, you then must
specify a local device password to use each subsequent time that you log in.
The Overview page displays.
4. Select Diagnostics > Logs.
The Logs page displays.
5.
In the Log Settings section enable or disable logs by doing the following for each
individual log:
•
Enable one or more logs: Click the Switch Logging button, Console Logging
button, Command Logging button, or a combination of these buttons so that
they turn green.
•
Disable one or more logs: Click the Switch Logging button, Console Logging
button, Command Logging button, or a combination of these buttons so that
they turn gray.
By default, the switch log is enabled but the console log and command log are
disabled.
Audio Video User Manual68Diagnostics and
Troubleshooting
AV Line of Fully Managed Switches M4250 Series