
User Manual
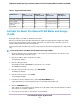


a. For each port that you want to assign to another VLAN, select a VLAN ID from the VLAN menu for
the individual port.
Each port can be assigned to a single VLAN only. However, for the port that you want to use as the
uplink port to the Internet connection or a server, select All from the VLAN menu for the individual
port.
b. Click the APPLY button.
Your settings are saved.
Manage Advanced Port-Based VLANs
In an advanced port-based VLAN configuration, ports with the same VLAN ID are placed into the same
VLAN, but you can assign a single port to multiple VLANs.
For more information about port-based VLANs, see the following sections:
• Activate the Advanced Port-Based VLAN Mode
• Create an Advanced Port-Based VLAN
• Change an Advanced Port-Based VLAN
• Delete an Advanced Port-Based VLAN
Activate the Advanced Port-Based VLAN Mode
By default, all types of VLANs are disabled on the switch.
When you activate the Advanced Port-Based VLAN mode, VLAN 1 is added to the switch and all ports are
made members of VLAN 1. This is the default VLAN in the Advanced Port-Based VLAN mode.
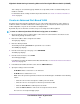
To activate the Advanced Port-Based VLAN mode:
1. Open a web browser from a computer that is connected to the same network as the switch or to the
switch directly through an Ethernet cable.
2. Enter the IP address that is assigned to the switch.
The login page displays.
3. Enter the switch password.
The default password is password. The password is case-sensitive.
The HOME page displays.
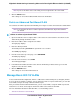
4. From the menu at the top of the page, select SWITCHING.
The QOS page displays.
5. From the menu on the left, select VLAN.
The VLAN page displays.
6. In the Advanced Port-Based VLAN section, click the ACTIVATE MODE button.
A pop-up window opens, informing you that the current VLAN settings will be lost.
7. Click the CONTINUE button.
Use VLANS for Traffic Segmentation
42
Nighthawk S8000 Gaming & Streaming Advanced 8-Port Gigabit Ethernet Switch (GS808E)