
Owner's Manual
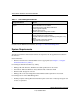

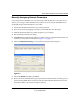
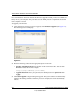
Table Of Contents
- Smart Switch Software User Manual GS748T
- Contents
- About This Manual
- Chapter 1 Switch Management Overview
- Chapter 2 Using the Smartwizard Discovery Utility
- Chapter 3 Basic Web Management
- Chapter 4 Configuring the Switch
- Configuring Ports
- Configuring the Link Aggregation Group (LAG)
- Setting Up SNMP
- Configuring and Creating VLANs
- Enabling Spanning Tree Protocol
- Establishing Multicast Groups
- Enabling Jumbo Frames
- Setting Rate Limits
- Setting QoS Global Configuration
- Enabling Storm Control
- Configuring the IP Access List
- Controlling Switch Access by MAC Address and VLAN ID
- Setting up Mirroring or “Sniffer Ports”
- Viewing Packet Statistics
- Appendix A Specifications and Default Values
- Appendix B Virtual Local Area Networks (VLANs)
- Appendix C Network Cabling
2-1
v1.0, October 2007
Chapter 2
Using the Smartwizard Discovery Utility
This section leads you through the steps necessary to begin managing your GS748T Smart Switch.
It covers how to install in a network that contains a DHCP server and one without DHCP.
Network with DHCP server
To install the switch in a network with a DHCP server, proceed as follows:
1. Connect the GS748T switch to a DHCP network.
2. Power on the switch by connecting its power cord.
3. Install the Smartwizard Discovery Utility program on your computer.
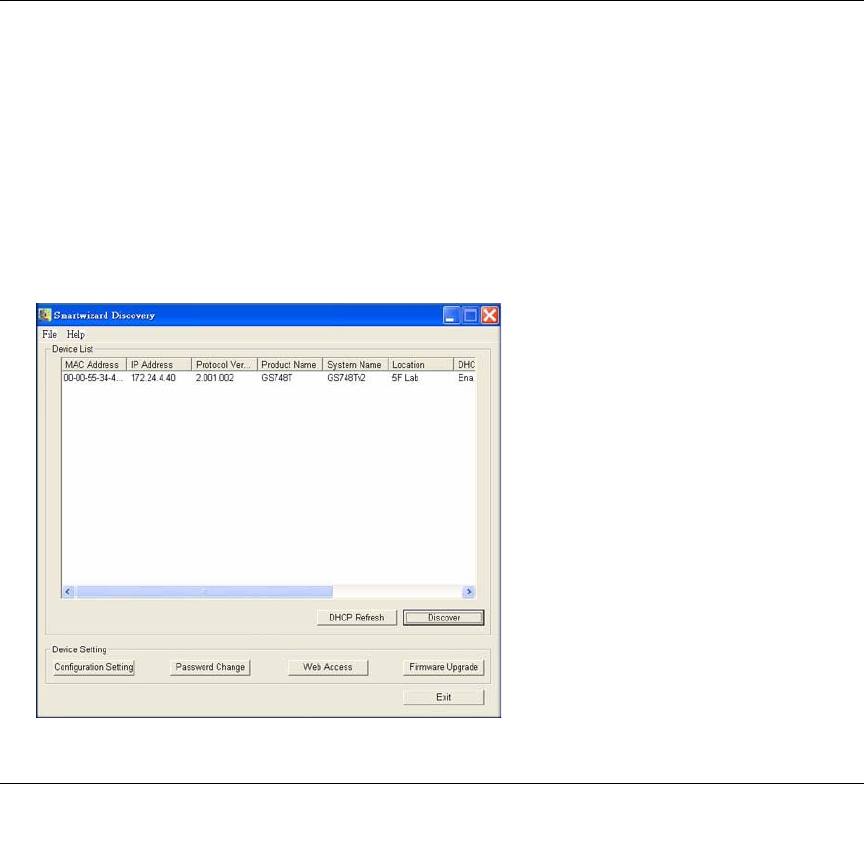
4. Start the Smartwizard Discovery utility.
5. Click Discover for the Smartwizard Discovery to find your GS748T Smart Switch. You
should see a screen similar to that shown below.
Figure 2-1