
User Manual
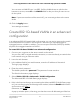
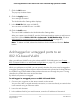
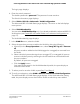
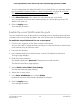
Table Of Contents
- Contents
- 1. Hardware Overview of the Switch
- 2. Install and Access the Switch in Your Network
- 3. Use VLANS for Traffic Segmentation
- VLAN overview
- Create basic port-based VLANs
- Assign ports to multiple port-based VLANs
- Create 802.1Q-based VLANs in a basic configuration
- Create 802.1Q-based VLANs in an advanced configuration
- Add tagged or untagged ports to an 802.1Q-based VLAN
- Specify a port PVID for an 802.1Q-based VLAN
- Manage the voice VLAN
- 4. Optimize Performance With Quality of Service
- 5. Manage Network Settings
- 6. Manage and Monitor the Switch
- Manage flow control
- Manage the port speed and the port status
- Enable loop prevention
- Manage the power saving mode
- Manually download and upgrade the firmware
- Reboot the switch
- Save the switch configuration
- Restore a saved switch configuration
- Return the switch to its factory default settings
- Enable port mirroring
- View switch information or change the switch device name
- View or clear the port statistics
- 7. Diagnostics and Troubleshooting
- A. Factory Default Settings and Technical Specifications
- B. Mount the Switch

Manage the OUI table
The switch includes default Organizationally Unique Identifiers (OUIs), which are
associated with VoIP phones of specific manufacturers. All traffic received on voice
VLAN ports from VoIP phones with a listed OUI is forwarded on the voice VLAN.
You can add and remove OUIs. The maximum number of OUI entries in the table is 15.
The first 3 bytes of the MAC address contain a manufacturer identifier, while the last 3
bytes contain a unique station ID. You must add an OUI prefix in the format AA:BB:CC.
To manage the OUI table:
1. Connect your computer to the same network as the switch.
You can use a WiFi or wired network connection, or connect directly to a switch that
is off-network using an Ethernet cable.
2. Launch a web browser.
3.
In the address field of your web browser, enter the IP address of the switch.
The login page displays.
4. Enter the switch password.
The default password is password. The password is case-sensitive.
The Switch Information page displays.
5. Select VLAN > Voice VLAN > OUI Table.
The OUI Table page displays.
6.
Take one of the following actions:
•
To add an OUI prefix to the table, do the following:
a.
In the Telephony (OUIs) field, enter an OUI in the format AA:BB:CC.
b.
In the Description field, enter a description with a maximum of 32 characters.
c. Click the Add button.
The OUI is added to the table.
•
To delete one or more OUI prefixes from the table, do the following:
a. Select one or more OUIs.
b. Click the Delete button.
The OUIs are removed from the table.
User Manual37Use VLANS for Traffic
Segmentation
8-Port Gigabit Ethernet Plus Switch with 2-Port 10G/Multi-Gig Uplinks GS110EMX