
User Manual
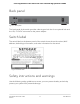


Table Of Contents
- Contents
- 1. Hardware Overview of the Switch
- 2. Install and Access the Switch in Your Network
- 3. Use VLANS for Traffic Segmentation
- VLAN overview
- Create basic port-based VLANs
- Assign ports to multiple port-based VLANs
- Create 802.1Q-based VLANs in a basic configuration
- Create 802.1Q-based VLANs in an advanced configuration
- Add tagged or untagged ports to an 802.1Q-based VLAN
- Specify a port PVID for an 802.1Q-based VLAN
- Manage the voice VLAN
- 4. Optimize Performance With Quality of Service
- 5. Manage Network Settings
- 6. Manage and Monitor the Switch
- Manage flow control
- Manage the port speed and the port status
- Enable loop prevention
- Manage the power saving mode
- Manually download and upgrade the firmware
- Reboot the switch
- Save the switch configuration
- Restore a saved switch configuration
- Return the switch to its factory default settings
- Enable port mirroring
- View switch information or change the switch device name
- View or clear the port statistics
- 7. Diagnostics and Troubleshooting
- A. Factory Default Settings and Technical Specifications
- B. Mount the Switch

•
Do not spill food or liquids on your product components, and never operate the
product in a wet environment. If the product gets wet, see the appropriate section
in your troubleshooting guide, or contact your trained service provider.
•
Do not push any objects into the openings of your product. Doing so can cause fire
or electric shock by shorting out interior components.
•
Use the product only with approved equipment.
•
If applicable to your product, allow the product to cool before removing covers or
touching internal components.
•
Operate the product only from the type of external power source indicated on the
electrical ratings label. If you are not sure of the type of power source required,
consult your service provider or local power company.
•
To avoid damaging your system, if your product uses a power supply with a voltage
selector, be sure that the selector is set to match the power at your location:
-
115V, 60 Hz in most of North and South America and some Far Eastern countries
such as South Korea and Taiwan
- 100V, 50 Hz in eastern Japan and 100V, 60 Hz in western Japan
-
230V, 50 Hz in most of Europe, the Middle East, and the Far East
•
Be sure that attached devices are electrically rated to operate with the power available
in your location.
•
Depending on your product, use only a supplied power adapter or approved power
cable:
If your product uses a power adapter:
-
If you were not provided with a power adapter, contact your local NETGEAR
reseller.
-
The power adapter must be rated for the product and for the voltage and current
marked on the product electrical ratings label.
If your product uses a power cable:
-
If you were not provided with a power cable for your system or for any
AC-powered option intended for your system, purchase a power cable approved
for your country.
-
The power cable must be rated for the product and for the voltage and current
marked on the product electrical ratings label. The voltage and current rating of
the cable must be greater than the ratings marked on the product.
•
To help prevent electric shock, plug the system and peripheral power cables into
properly grounded power outlets.
User Manual13Hardware Overview of the
Switch
8-Port Gigabit Ethernet Plus Switch with 2-Port 10G/Multi-Gig Uplinks GS110EMX