
GC110-GC110P Hardware Installation Guide
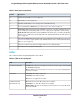
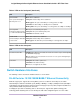
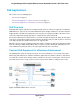
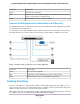
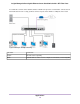
Table Of Contents
- Contents
- 1. Introduction
- 2. Hardware Overview
- 3. Applications
- 4. Installation
- Step 1: Prepare the Site
- Step 2: Protect Against Electrostatic Discharge
- Step 3: Unpack the Switch
- Step 4: Install the Switch
- Optional Step 5: Install SFP Transceiver Modules
- Step 6: Connect Devices to the Switch
- Step 7: Check the Installation
- Step 8: Apply Power and Check the LEDs
- Step 9: Manage the Switch
- 5. Troubleshooting
ConnectionLine Color
Internet router or gatewayPurple
PoE devices such as Insight managed (or other) WiFi access points, Arlo (or
other) security cameras, and VoIP phones
Blue
Network devices such as a desktop computerBlack
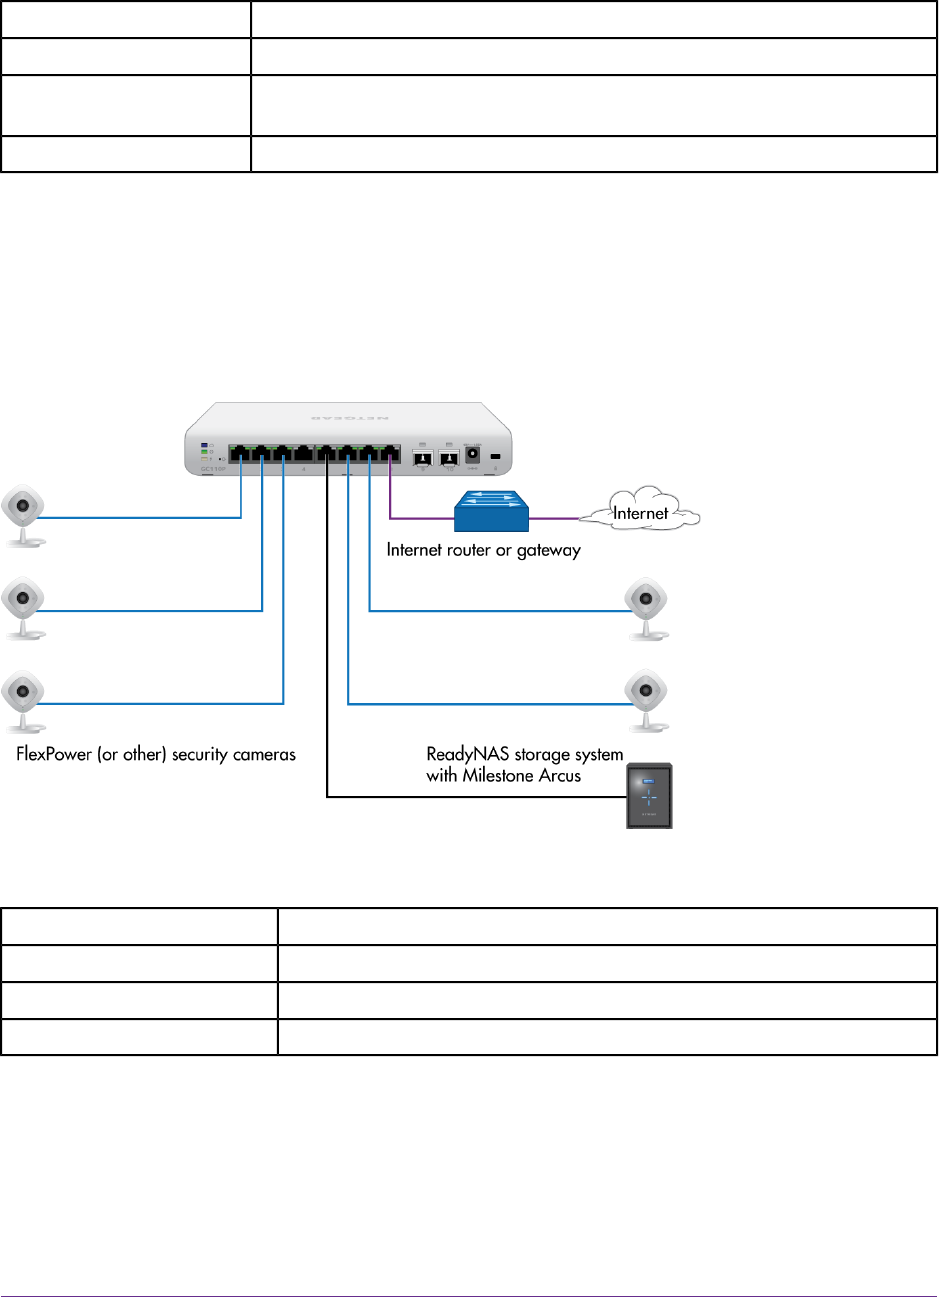
Connect PoE Equipment for Surveillance and Security
The following figure shows an example of how you can connect PoE and non-PoE equipment to the switch
for surveillance and security purposes.
In a small office or home office network, the blue network icon represents a router that is connected to an
Internet modem. In such a setup, you must connect one port on the switch to a LAN port on the router.
Figure 5. Sample switch surveilliance and security application
ConnectionLine Color
Internet router or gatewayPurple
PoE devices such as FlexPower (or other) security camerasBlue
Network devices such as a ReadyNAS storage systemBlack
Desktop Switching
You can use the switch as a desktop switch to build a small network that provides up to 1 Gbps access to
servers such as a file server. In a small network such as a small office or home office network, connect the
switch to a router that, in turn, is connected to an Internet modem.
With 1 Gbps connections, the switch always functions in full-duplex mode. Any switch port that is connected
to a computer or file server can provide up to 2 Gbps bidirectional throughput.
Applications
18
Insight Managed 8-Port Gigabit Ethernet Smart Cloud Switch with 2 SFP Fiber Ports