
Quick Reference Guide

ProSafe Dual WAN Gigabit Firewall with SSL & IPsec VPN FVS336G Reference Manual
Virtual Private Networking Using IPsec 5-31
v1.0, January 2010
d. Under Virtual Adapter pull-down menu, choose Preferred. The Internal Network IP
Address should be 0.0.0.0.
e. Select your Internet Interface adapter from the Name pull-down menu.
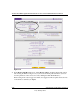
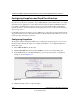
3. On the left-side of the menu, choose Security Policy.
a. Under Security Policy, Phase 1 Negotiation Mode, check the Aggressive Mode radio
button.
b. Check the Enable Perfect Forward Secrecy (PFS) box, and choose the Diffie-Hellman
Group 2 from the PFS Key Group pull-down menu.
c. Enable Replay Detection should be checked.
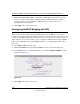
4. Click on Authentication (Phase 1) on the left-side of the menu and choose Proposal 1. Enter
the Authentication values to match those in the VPN firewall ModeConfig Record menu.
5. Click on Key Exchange (Phase 2) on the left-side of the menu and choose Proposal 1. Enter
the values to match your configuration of the VPN firewall ModeConfig Record menu. (The
SA Lifetime can be longer, such as 8 hours [28800 seconds]).
6. Click the Save icon to save the Security Policy and close the VPN ProSafe VPN client.
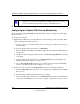
Testing the Mode Config Connection
To test the connection:
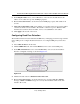
1. Right-click on the VPN client icon in the Windows toolbar and click Connect. The connection
policy you configured will appear; in this case “My Connections\modecfg_test”.
2. Click on the connection. Within 30 seconds the message “Successfully connected to
MyConnections/modecfg_test is displayed and the VPN client icon in the toolbar will read
“On”.
3. From the client PC, ping a computer on the VPN firewall LAN.
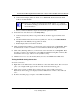
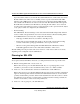
Note: If no box is displayed for Internal Network IP Address, go to Options/
Global Policy Settings, and check the box for “Allow to Specify Internal
Network Address.”