
Owner's Manual
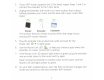
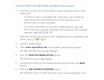
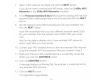
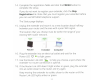
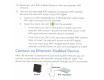
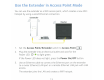
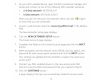
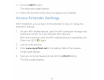
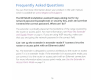
Table Of Contents
- User Manual
- Contents
- 1. Overview
- 2. Get started
- 3. Extender Network Settings
- Enable or disable One WiFi Name
- Enable or disable smart connect
- View connected devices
- View WiFi settings
- Change the WiFi network name
- Turn off the SSID broadcast to create a hidden network
- Disable or enable the WiFi radios
- Change the WiFi speed
- Use WPS to add a computer to the extender’s WiFi network
- Deny access to a computer or WiFi device
- Set up an access schedule
- Change the extender’s device name
- Set up the extender to use a static IP address
- Configure a router with advanced MAC settings to work with your extender
- Boost your video streaming with FastLane technology
- Enable or disable 20/40 MHz coexistence
- 4. Maintain and monitor the extender
- Change the extender login user name and password
- Turn password protection off and on
- Recover a forgotten user name or password
- Automatically adjust for daylight saving time
- Manually set the extender clock
- Back up and manage the extender configuration
- Return the extender to its factory default settings
- Update the extender firmware
- Restart the extender from the extender web interface
- 5. FAQs and troubleshooting
- 6. Supplemental information
- Quick Start

Connect With
the
NETGEAR
Installation
Assistant
1. Connect
your
device
to
the
ex
tender
us
ing a wired Ethernet
or
WiFi
connection:
To
connect
with
a wired Ethernet connection, use
an
Et
hernet
cable
to
connect
the
Ethernet
port
on
the
extender
to
an
Ethernet
port
on
your
computer.
•
To
connect
with
WiFi, on
your
WiFi-enabled device, open
the
WiFi connection manager and
locate
and connect
to
the
ex
tender
network
called
NETGEAR
EXT.
After
the
connection
with
your
WiFi-enabled devi
ce
is established, t he
Client
Link
LED
(<
>)
lights.
2. Launch a web browser.
3. Enter
www.mywifiext.net
in
the
address
field
of
the
browser.
The New Extender Setup page displays.
4.
Click
the
NEW
EXTENDER SETUP
button.
The
Create
Account page displays.
5.
Complete
the
fields
on
the
Create
Account page and
click
t he
NEXT
button
.
6.
Click
the
WIFI
RANGE EXTENDER
button.
The extender scans
for
WiFi
networks
in
your
area and
displays
a
list.
9