
User Manual
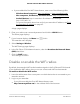
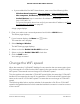

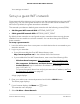
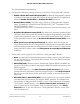
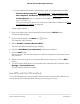
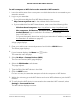
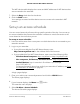
Table Of Contents
- Contents
- 1. Overview
- 2. Get Started
- 3. Extender Network Settings
- Enable or disable the One WiFi Name feature
- Enable or disable Smart Connect
- Enable or disable MU-MIMO
- Enable or disable WiFi 6
- View connected devices
- View WiFi settings
- Change the WiFi network name
- Turn off the SSID broadcast to create a hidden network
- Disable or enable the WiFi radios
- Change the WiFi speed
- Set up a guest WiFi network
- Use WPS to add a computer to the extender’s WiFi network
- Deny access to a computer or WiFi device
- Set up an access schedule
- Change the extender’s device name
- Set up the extender to use a static IP address
- Adjust the WiFi coverage
- Enable FastLane technology
- Configure a router with advanced MAC settings to work with your extender
- 4. Maintain and Monitor the Extender
- Change the extender login user name and password
- Turn password protection off and on
- Recover a forgotten user name or password
- Automatically adjust for daylight saving time
- Manually set the extender clock
- Set your time zone
- Back up and manage the extender configuration
- Back up the configuration settings
- Restore the configuration settings
- Return the extender to its factory default settings
- Update the extender firmware
- Restart the extender from the extender web interface
- Turn the LEDs On or Off
- 5. FAQs and troubleshooting
- 6. Supplemental Information

•
If you enabled the One WiFi Name feature, enter one of the following URLs:
-
Windows-based computers. http://mywifiext/ or http://mywifiext.local/
-
Mac computers, iOS devices, and Linux devices. http://mywifiext.local/
-
Android devices. http://<extender’s IP address>/ (for example,
http://192.168.1.3/)
For more information about how to find your extender’s IP address, see Find
the Extender’s IP address on page 65.
A login page displays.
3. Enter your admin user name and password and click the LOG IN button.
The Status page displays.
4.
If your browser displays the Menu icon , click it.
The extender menu displays.
5. Select Do More > Connect Devices (WPS).
The Connected Devices (WPS) page displays.
6. Leave the Push Button (recommended) radio button selected.
7. Click the WPS button.
For two minutes, the extender attempts to add the computer or WiFi device to its
WiFi network.
8. Within two minutes, go to the computer WiFi device and press or click its WPS
button.
9.
To verify that the WiFi device is connected to the extender’s WiFi network, select
Settings > Connected Devices.
The WiFi device displays onscreen.
Use WPS with the PIN method
To use the PIN method to connect a WiFi device to the extender’s WiFi network, you
must know the PIN of the WiFi device that you are trying to connect.
User Manual37Extender Network Settings
AX1600 4-Stream WiFi 6 Mesh Extender