
User Manual
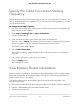
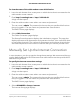
Table Of Contents
- Contents
- 1. Hardware Setup
- 2. Connect to the Network and Access the Cable Modem Router
- 3. Specify Your Internet Settings
- 4. Control Access to the Internet
- 5. Share USB Devices Attached to the Cable Modem Router
- USB Storage Device Requirements
- Connect a USB Storage Device to the Cable Modem Router
- Access a USB Device Connected to the Cable Modem Router From a Windows-Based Computer
- Map a USB Device to a Windows Network Drive
- Access a USB Storage Device That Is Connected to the Cable Modem Router From a Mac
- Control Access to the USB Storage Device
- Use FTP Within the Network
- View or Change Network Folders on a USB Storage Device
- Add a Network Folder on a USB Storage Device
- Edit a Network Folder on a USB Storage Device
- Approve USB Devices
- Access the USB Storage Device Through the Internet
- Safely Remove a USB Storage Device
- 6. Share a USB Printer
- 7. Specify Network Settings
- View or Change the WAN Settings
- Set Up a Default DMZ Server
- Change the Cable Modem Router’s Device Name
- Change the LAN TCP/IP Settings
- Specify the IP Addresses That the Cable Modem Router Assigns
- Disable the DHCP Server Feature in the Cable Modem Router
- Manage LAN IP Addresses
- Improve Network Connections With Universal Plug-N-Play
- Use the WPS Wizard for WiFi Connections
- Specify Basic WiFi Settings
- Change the WiFi Security Option
- Set Up a Guest Network
- Control the WiFi Radios
- Specify WPS Settings
- Enable or Disable Router Mode
- 8. Manage Your Network
- Change the admin Password
- Set Up Password Recovery
- Recover the admin Password
- View Modem Router Status
- View Logs of Cable Modem Router Activity
- View Event Logs
- Run the Ping Utility
- Run the Traceroute Utility
- Monitor Internet Traffic
- View Devices Currently on the Network
- Manage the Cable Modem Router Configuration File
- View or Change the Cable Modem Router WiFi Channel
- Set Up and Manage Dynamic DNS
- Remote Management
- 9. Specify Internet Port Settings
- 10. Troubleshooting
- 11. Supplemental Information

5.
If your Internet connection requires an account name or host name, type it in the
Account Name (If Required) field.
6.
If your Internet connection requires a domain name, type it in the Domain Name (If
Required) field.
For the other sections in this page, the default settings usually work, but you can
change them.
7. Select an Internet IP Address radio button:
•
Get Dynamically from ISP. Your ISP uses DHCP to assign your IP address. Your
ISP automatically assigns these addresses.
•
Use Static IP Address. Enter the IP address, IP subnet mask, and the gateway IP
address that your ISP assigned. The gateway is the ISP cable modem router to
which your cable modem router connects.
8. Select a Domain Name Server (DNS) Address radio button:
•
Get Automatically from ISP. Your ISP uses DHCP to assign your DNS servers.
Your ISP automatically assigns this address.
•
Use These DNS Servers. If you know that your ISP requires specific servers, select
this option. Enter the IP address of your ISP’s primary DNS server. If a secondary
DNS server address is available, enter it also.
9.
Click the Apply button.
Your settings are saved.
User Manual27Specify Your Internet Settings
AC1750 WiFi Cable Modem Router