
User Manual

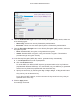
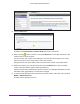
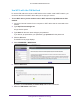

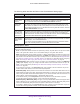
Table Of Contents
- AC1600 WiFi Cable Modem Router
- Contents
- 1. Hardware Overview and Setup
- 2. Connect to the Network and Access the Modem Router
- 3. Customize the Internet Settings
- 4. Manage the Basic WiFi Network Settings
- 5. Secure Your Network
- 6. Manage the WAN and LAN Network Settings
- Manage the WAN Security Settings
- Set Up a Default DMZ Server
- Manage the SIP Application-Level Gateway
- Manage the Modem Router’s LAN IP Address Settings
- Manage IP Address Reservation
- Manage the IPv6 LAN Settings
- Change the Modem Router’s Device Name
- Manage the Built-In DHCP Server
- Manage the DHCP Server Address Pool
- Manage Universal Plug and Play
- 7. Manage the Modem Router and Monitor Your Network
- View the Status and Statistics of the Modem Router
- View the Traffic Statistics
- View Devices Currently on the Network
- View WiFi Channels in Your Environment
- View WiFi Networks in Your Environment
- View and Manage the Log
- Change the Password
- Manage the Device Settings File of the Modem Router
- Return the Modem Router to Its Factory Default Settings
- Reboot the Modem Router
- Monitor and Meter Internet Traffic
- Manage the Modem Router Remotely
- 8. Share a Storage Device
- USB Device Requirements
- Connect a USB Device to the Modem Router
- Access a Storage Device Connected to the Modem Router
- Manage Access to a Storage Device
- Enable FTP Access Within Your Network
- View Network Folders on a Device
- Add a Network Folder on a Storage Device
- Change a Network Folder, Including Read and Write Access, on a USB Drive
- Approve USB Devices
- Safely Remove a USB Device
- Enable the Media Server
- 9. Share a USB Printer
- 10. Access Storage Devices Through the Internet
- 11. Manage the Advanced WiFi Network Settings
- 12. Manage Port Forwarding and Port Triggering
- 13. Diagnostics and Troubleshooting
- A. Factory Default Settings and Specifications

Manage the Basic WiFi Network Settings
48
AC1600 WiFi Cable Modem Router
8. In the Enter Client's PIN field, enter the PIN number of the WiFi device.
9. Click the Next button.
For four minutes, the modem router attempts to find the WiFi device (that is, the client)
that you want to join the modem router’
s main WiFi network.
During this time, both WiFi LEDs on the front panel of the modem router blink amber.
10. Within four minutes, go to the WiFi device and use its WPS software to join the network
without entering a password.
When the modem router establishes a WPS connection, the LED lights solid green and
the
Add WPS Client page displays a confirmation message.
11. To verify that the WiFi device is connected to the modem router’s main WiFi network, select
BASIC > Attached Devices.
The WiFi device displays onscreen.
Manage the Basic WiFi Settings and WiFi Security of the
Guest Network
A guest network allows visitors to use the Internet without using your WiFi security key. By
default, the guest WiFi network is disabled. You can enable and configure the guest WiFi
network for each WiFi band: 2.4 GHz b/g/n and 5.0 GHz a/n/ac.
Set Up and Enable a Guest Network
The WiFi mode of the guest WiFi network depends on the WiFi mode of the main WiFi
network. For example, if you configure the WiFi mode for the main WiFi network as Up to
54 Mbps in the 2.4 GHz band, the guest WiFi network also functions in the Up to 54 Mbps
mode in the 2.4 GHz band. For information about configuring the WiFi mode, see Manage the
Basic WiFi Settings and WiFi Security of the Main Network on page 36.