
User's Manual
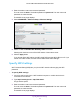
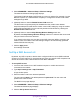
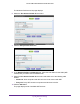

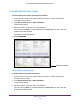


Table Of Contents
- AC1200 WiFi Cable Modem Router
- Contents
- 1. Hardware Setup
- 2. Connect to the Network and Access the Modem Router
- 3. Specify Initial Settings
- 4. Control Access to the Internet
- 5. Share a USB Storage Device Attached to the Modem Router
- USB Device Requirements
- Connect a USB Storage Device to the Modem Router
- Access a USB Drive Connected to the Modem Router From a Windows Computer
- Map a USB Device to a Windows Network Drive
- Access a USB Storage Device That Is Connected to the Modem Router From a Mac
- Control Access to the USB Drive
- Use FTP Within the Network
- View or Change Network Folders on a USB Drive
- Add a Network Folder on a USB Storage Device
- Edit a Network Folder on a USB Storage Device
- Approve USB Storage Devices
- Safely Remove a USB Storage Device
- 6. Specify Network Settings
- View or Change the WAN Settings
- Change the MTU Size
- Set Up a Default DMZ Server
- Change the Modem Router’s Device Name
- Change the LAN TCP/IP Settings
- Specify the IP Addresses That the Modem Router Assigns
- Manage LAN IP Addresses
- Use the WPS Wizard for WiFi Connections
- Specify Basic WiFi Settings
- Change the WiFi Security Option
- Set Up a WiFi Guest Network
- Control the WiFi Radios
- Specify WPS Settings
- Set Up a WiFi Access List
- Dynamic DNS
- Improve Network Connections With Universal Plug-N-Play
- 7. Manage Your Network
- View Modem Router Status
- Reboot the Modem Router
- Change the Router Mode
- View and Manage Logs of Modem Router Activity
- Manage the Modem Router Configuration File
- Change the admin Password
- View Event Logs
- Run the Ping Utility
- Run the Traceroute Utility
- View WiFi Access Points in Your Area
- View or Change the Modem Router WiFi Channel
- Remote Management
- Control the LED Settings
- 8. Specify Internet Port Settings
- 9. Troubleshooting
- A. Supplemental Information

Specify Network Settings
63
AC1200 WiFi Cable Modem Router Model C6220
The Wireless Card Access List page displays.
6. Select the T
urn Access Control On check box.
7. Click the Set Up Access List button.
8. In the Network Profiles (2.4 GHz b/g/n) list, select the radio button for the SSID (WiFi
network) that you want to use the access list for.
9. Select the T
urn Access Control On check box and select one of the following radio
buttons:
• Allow List.
Allow computers and devices in the list to connect with WiFi.
• Deny List. Deny WiFi access to computers and devices in the list.
10. Click the Add button.
The page displays a list of available WiFi devices.