
User Guide
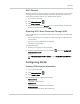
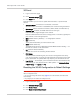
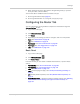

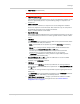
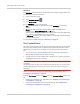
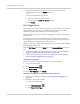
Table Of Contents
- Contents
- Preface
- Important Notice
- Safety and Hazards
- Limitation of Liability
- Patents
- Licenses
- Copyright
- Trademarks
- Contact Information
- Additional Information and Updates
- Revision History
- 1: Device Basics
- 2: Your Device
- 3: Installing and Setting Up the Device
- 4: Using Your Device
- 5: Settings
- 6: Resources
- 7: Technical Specifications, Safety Information, and Regulatory Information
- Index

Settings
Rev 1.0 Apr.10 99
Enabling Port Forwarding
Before you can use or configure Port Forwarding, you must enable it.
1. Log in to the home page.
2. Click
Advanced settings ().
3. Click
Router > Basic.
4. Next to
Port Forwarding, select Enable.
5. Click
Save.
Enabling Port Forwarding for an Application
1. Ensure you've enabled port forwarding. See "Enabling Port Forwarding" on
page 99.
2. Display the "Port forward" window.
a. Log in to the home page.
b. Click
Advanced settings ().
c. Click
Router > Port Forward.
3. In the last row of the table, click the
Application field, and select the application
type from the list.
The values for
Start and End ports are automatically filled in.
4. If necessary, change the range of port numbers associated with the appli-
cation. Traffic will be allowed (not blocked) if its destination port number is in
the specified range.
a. In the
Start field, enter the number that starts the port range.
b. In the
End field, enter the number that ends the port range.
If the range consists of only one port, enter the number that you entered
in the
Start field.
5. In the
Protocol list, click the protocol(s) used for this application (TCP, UDP, or
both).
6. In the
IP Address field, enter the IP address of the server to be accessed.
7. Ensure
Enable is selected.
8. Click
Add.
9. Click
save.
Disabling Port Forwarding for an Application
1. Ensure you've enabled port forwarding. See "Enabling Port Forwarding" on
page 99.
2. Display the "Port forward" window.
a. Log in to the home page.
b. Click
Advanced settings ().
c. Click
Router > Port forward.