
User's Manual
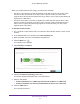
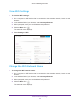
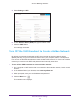

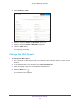
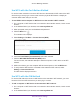
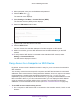
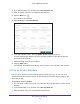
Table Of Contents
- AC1200 WiF Range Extender
- Table of Contents
- 1. Overview
- Meet Your Extender
- 2. Get Started
- Install the WiFi Extender
- 3. Extender Network Settings
- View Connected Devices
- Boost Your Video Streaming with FastLane Technology
- View WiFi Settings
- Change the WiFi Network Name
- Turn Off the SSID Broadcast to Create a Hidden Network
- Disable or Enable the WiFi Radios
- Change the WiFi Speed
- Use WPS to Add a Computer to the Extender’s WiFi Network
- Deny Access to a Computer or WiFi Device
- Set Up an Access Schedule
- Change the Extender’s Device Name
- Set Up the Extender to Use a Static IP Address
- Use the Extender with MAC Filtering or Access Control
- 4. Maintain and Monitor the Extender
- Change the Extender User Name and Password
- Turn Password Protection Off and On
- 5. FAQs and Troubleshooting
- FAQs
- A. Factory Settings and Technical Specifications
- Factory Default Settings
- Technical and Environmental Specifications

Extender Network Settings
30
AC1200 WiF Range Extender
4. Click the Menu icon .
The extender menu displays.
5. Select Do More >
Access Schedule.
6. Select the Access Schedule On radio button.
The screen adjusts.
7. In the Days menu and the T
ime menu, select the days and time when you want to disable
Internet access.
8. Click the Add T
ime button to add the time that you specified to the Scheduled Times table.
9. Click the SA
VE button.
Your settings are saved.
Change the Extender’s Device Name
The default name is EX6150.
To change the extender’s device name:
1. On a computer or WiFi device that is connected to the extender network, launch a web
browser
.
2. In the address field of your browser
, enter www.mywifiext.net.
3. When prompted, enter your email address and password.
4. Click the Menu icon
.
The extender menu displays.
5. Select Settings > W
iFi Settings.
The WiFi Settings screen displays.