
User's Manual


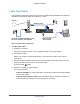
Table Of Contents
- N300 Wireless Router
- Contents
- 1. Hardware Setup
- 2. Connect to the Network and Access the Router
- 3. Specify Your Internet Settings
- 4. Networking
- View or Change WAN Settings
- Set Up a Default DMZ Server
- Change the Router’s Device Name
- Change the LAN TCP/IP Settings
- Specify the IP Addresses that the Router Assigns
- Disable the DHCP Server Feature in the Router
- Reserve LAN IP Addresses
- Use the WPS Wizard for WiFi Connections
- Specify Basic WiFi Settings
- Change the WiFi Security Option
- Set Up a Guest Network
- Control the Wireless Radio
- Set Up a Wireless Schedule
- Set up a Wireless Access List
- Specify WPS Settings
- Wireless Distribution System
- Static Routes
- View Devices Currently on the Network
- Improve Network Connections with Universal Plug and Play
- 5. Manage Your Network
- 6. Troubleshooting
- A. Supplemental Information
Hardware Setup
9
N300 Wireless Router
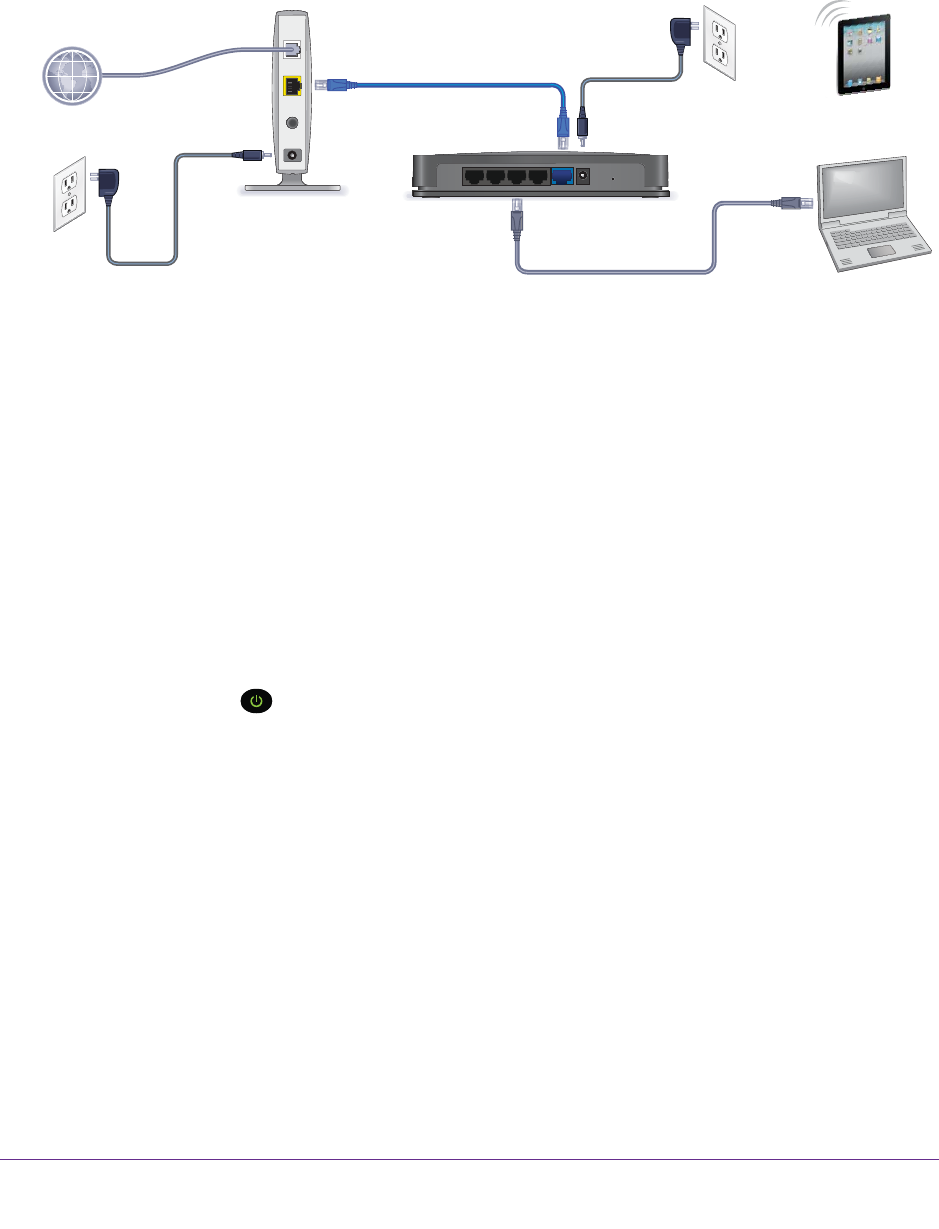
Cable Your Router
The installation guide that came in the box has more details about installation.The following
illustration shows typical cable connections for a router.
Y
our router might look different than
t
he router shown in this diagram.
Modem
Router
Internet
Ethernet cable
Ethernet cable
(not included)
Figure 1. Router cable connections
To cable your router:
1. Prepare your modem.
Unplug your modem’s power. If it has a battery backup, remove the battery.
2. Connect the modem.
Plug in your modem. Put the battery back in. Then cable the modem to the router’s
Internet port
3. Connect the power adapter cord that came in the package to the power input on the rear
panel of the router and plug it in to an electrical outlet.
The Power LED
lights.
4. Connect a computer or wireless device.
You have two options:
• Connect with W
iFi. To connect with WiFi, use the WiFi network name and password
on the product label.
• Connect with an Ethernet cable. Use an Ethernet cable to connect a computer to
one of the Ethernet LAN ports on the rear panel of the router
.