
User's Manual
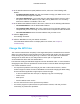
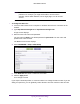

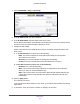
Table Of Contents
- N300 Wireless Router
- Contents
- 1. Hardware Setup
- 2. Connect to the Network and Access the Router
- 3. Specify Your Internet Settings
- 4. Networking
- View or Change WAN Settings
- Set Up a Default DMZ Server
- Change the Router’s Device Name
- Change the LAN TCP/IP Settings
- Specify the IP Addresses that the Router Assigns
- Disable the DHCP Server Feature in the Router
- Reserve LAN IP Addresses
- Use the WPS Wizard for WiFi Connections
- Specify Basic WiFi Settings
- Change the WiFi Security Option
- Set Up a Guest Network
- Control the Wireless Radio
- Set Up a Wireless Schedule
- Set up a Wireless Access List
- Specify WPS Settings
- Wireless Distribution System
- Static Routes
- View Devices Currently on the Network
- Improve Network Connections with Universal Plug and Play
- 5. Manage Your Network
- 6. Troubleshooting
- A. Supplemental Information
Networking
29
N300 Wireless Router
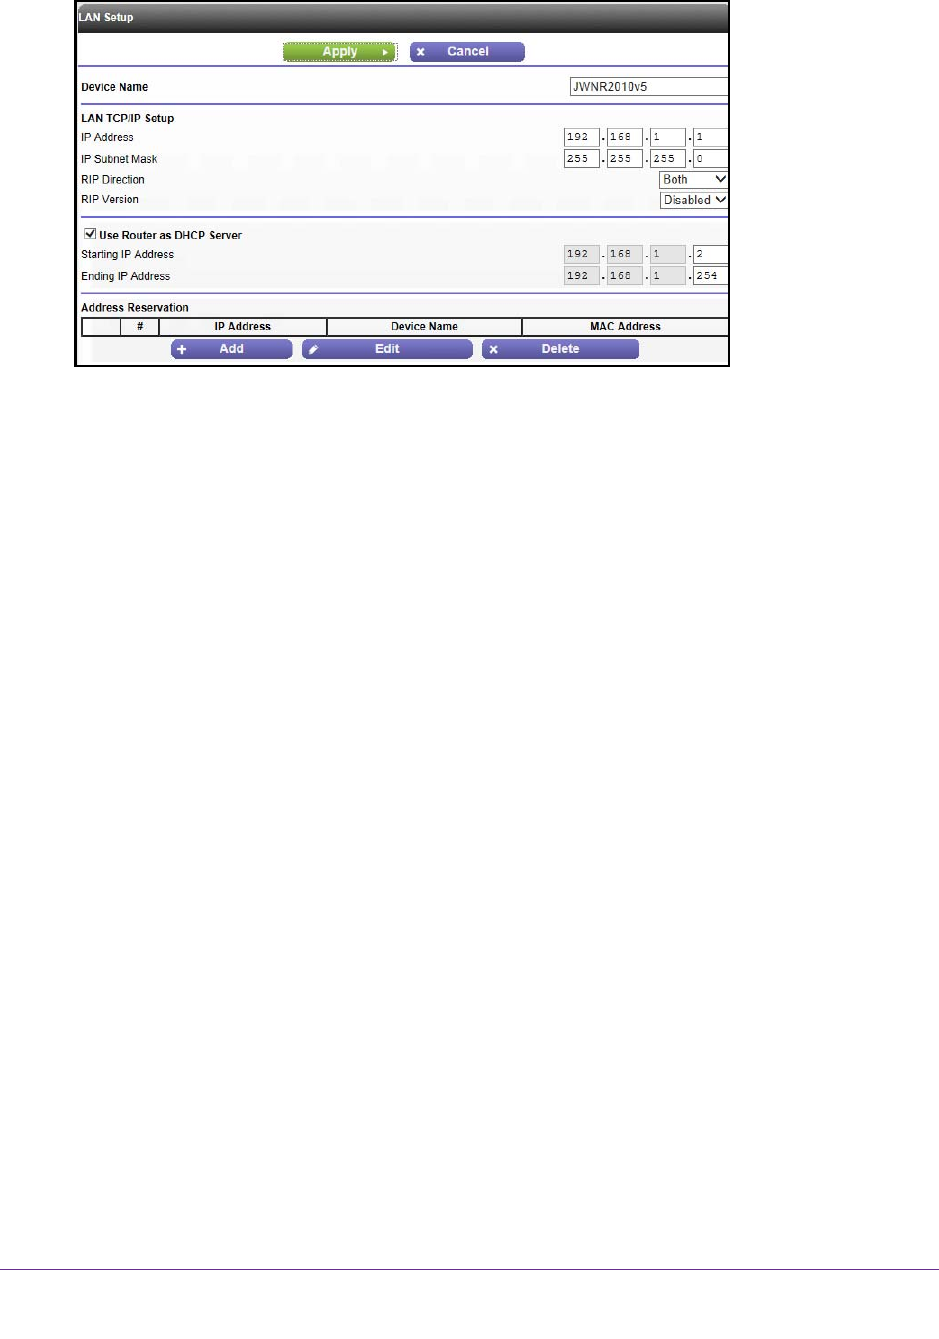
4. Select ADVANCED > Setup > LAN Setup.
5. In the IP Address field, type the IP address.
6. In the IP Subnet Mask, type the subnet mask of the router.
The IP address and subnet mask identifies which addresses are local to a specific device
and which must be reached through a gateway or router.
7. Change the RIP settings.
Router Information Protocol (RIP) allows a router t
o exchange routing information with
other routers.
a. In the RIP Direction list, select one of the following:
- Both. The router broadcasts its routing table periodically and incorporates
information that it receives.
- Out Only. The router broadcasts its routing table periodically
.
- In Only. The router incorporates the RIP information that it receives.
b. In the RIP Version list, select one of the following:
- Disabled.
This is the default setting.
- RIP-1.
This format is universally supported. It is adequate for most networks,
unless you have an unusual network setup.
- RIP-2.
This format carries more information. Both RIP-2B and RIP-2M send the
routing data in RIP-2 format. RIP-2B uses subnet broadcasting. RIP-2M uses
multicasting.
8. Click the Apply button.
Your changes are saved.
If you changed the LAN IP address of the router, you are disconnected when this change
takes ef
fect.
9. To reconnect, close your browser, relaunch it, and log in to the router