
User's Manual


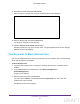


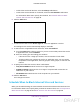
Table Of Contents
- N300 Wireless Router
- Contents
- 1. Hardware Setup
- 2. Connect to the Network and Access the Router
- 3. Specify Initial Settings
- 4. Optimize Performance
- 5. Control Access to the Internet
- 6. Specify Network Settings
- Set Up a Default DMZ Server
- Change the Router’s Device Name
- Change the LAN TCP/IP Settings
- Specify the IP Addresses That the Router Assigns
- Reserve LAN IP Addresses
- Use the WPS Wizard for WiFi Connections
- Specify Basic WiFi Settings
- Set Up a WiFi Guest Network
- Control the Wireless Radio
- Set Up a WiFi Schedule
- Specify WPS Settings
- Dynamic DNS
- 7. Manage Your Network
- 8. Specify Internet Port Settings
- 9. Troubleshooting
- A. Supplemental Information

Control Access to the Internet
45
N300 Wireless Router
After installation, Live Parental Controls automatically starts.
7. Click the Next button.
8. Read the note, and click the Next button again to proceed.
Because Live Parental Controls uses free OpenDNS accounts, you are prompted to log
in or create a free account.
9. Select a radio button as follows:
• If you already have an OpenDNS account, leave the Yes radio button selected.
• If you do not have an OpenDNS account, select the No radio button.
10. Click the Next
button.
If you are creating an account, the following screen displays:
DRAFT