
User's Manual
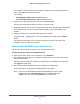
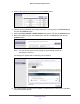

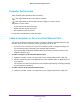
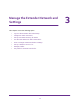

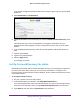

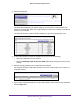
Table Of Contents
- WN3000RPv2 WiFi Range Extender
- Contents
- 1. Get to Know Your Extender
- 2. Install Your Extender
- 3. Manage the Extender Network and Settings
- Log In to the Extender After Initial Setup
- Change the admin Password
- Set Up Password Recovery for admin
- Use the Smart Setup to Connect the Extender to a Network
- Use the WPS Wizard for WiFi Connections
- View or Change Advanced Wireless Settings
- View or Change the WPS Settings
- Set Up a Wireless Access List
- Manage Profiles
- 4. Monitor and Maintain the Extender
- 5. FAQs and Troubleshooting
- A. Supplemental Information

Install Your Extender
12
WN3000RPv2 WiFi Range Extender
4. Select a WiFi network to extend and click the Continue button.
5. Type the network password (also called passphrase or security key) in the Password field,
and click the Continue button.
6. Select the Private Network or Public Network radio button, and click the Continue button.
7. Enter name (SSID) for your new extender WiFi network in the Name field and click the
Continue button.
Note: You can use the same security settings as your existing network by
selecting the check box.
The settings are applied and the following screen displays:
8. Use a WiFi network manager on the computer or mobile device to connect to the extender’s
newly created WiFi network.