
User's Manual
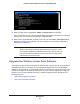


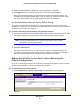


Table Of Contents
- ProSafe Dual Band Wireless-N Access Point WNDAP360
- Contents
- 1. Introduction
- 2. Installation and Basic Configuration
- 3. Wireless Configuration and Security
- 4. Management
- 5. Advanced Configuration
- 6. Troubleshooting
- Basic Functioning
- You Cannot Access the Internet or the LAN from a Wireless-Capable Computer
- You Cannot Configure the Wireless Access Point from a Browser
- When You Enter a URL or IP Address a Time-Out Error Occurs
- Troubleshooting a TCP/IP Network Using the Ping Utility
- Problems with Date and Time
- Use the Packet Capture Tool
- A. Supplemental Information
- B. Command-Line Reference
- C. Notification of Compliance
- Index

Management
64
ProSafe Dual Band Wireless-N Access Point WNDAP360
Figure 35.
5. Specify the following information:
• Firmware File Name. Th
e name of the unzipped software file.
• TFTP Server IP. Th
e IP address of your TFTP server.
6. Click Apply to
initiate the upgrade process.
During the upgrade process, the wireless access point automatically restarts. The
upgrade process typically t
akes several minutes. When the Test LED turns off, wait a few
more seconds before doing anything with the wireless access point.
7. Verify that the new software file has been installed by selecting Mo
nitoring > System. The
System screen displays (see Figure 42 on page 70
). The firmware version is shown in the
Access Point Information section of the screen.
Manage the Configuration File or Reset to Factory
Defaults
The wireless access point settings are stored in the configuration file. You can save this file
(back it up) to a computer, restore it from a computer, or reset it to factory default settings.
Save the Configuration
To save your settings:
1. Select Ma
intenance > Upgrade > Backup Settings. The Backup Settings screen
displays (see the following figure).
2. Click Backup. Your
browser extracts the configuration file (the file name is config) from the
wireless access point and prompts you for a location on your computer to store the file.
3. Follow the instructions of your browser to save the file.