
User's Manual


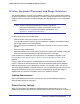


Table Of Contents
- ProSafe Wireless-N Access Point WNAP320
- Contents
- 1. Introduction
- 2. Installation and Configuration
- Wireless Equipment Placement and Range Guidelines
- Understanding WNAP320 Wireless Security Options
- Installing theWireless Access Point
- Deploying the ProSafe Wireless Access Point
- Mounting the ProSafe Wireless Access Point Using the Wall Mount Kit (Optional)
- Setting Basic IP Options
- Configuring Wireless Settings
- Setting Up and Testing Basic Wireless Connectivity
- Understanding Security Profiles
- 3. Management
- Remote Management
- Remote Console
- Upgrading the Wireless Access Point Software
- Configuration File Management
- Restoring the WNAP320 to the Factory Default Settings
- Changing the Administrator Password
- Enabling the Syslog Server
- Using Activity Log Information
- Viewing General Summary Information
- Viewing Network Traffic Statistics
- Viewing Available Wireless Station Statistics
- Enabling Rogue AP Detection
- Viewing and Saving AP Lists
- 4. Advanced Configuration
- 5. Troubleshooting and Debugging
- No lights are lit on the product family.
- No lights are lit on the access point.
- The Wireless LAN LED does not light up.
- The Wireless LAN activity light does not light up.
- The Ethernet LAN LED is not lit.
- I cannot access the Internet or the LAN with a wireless-capable computer.
- I cannot connect to the WNAP320 to configure it.
- When I enter a URL or IP address, I get a time-out error.
- Using the Restore Factory Settings Button to Restore Default Settings
- A.
- A. Supplemental Information
- C. Compliance Notification

Chapter 2. Installation and Configuration | 15
ProSafe Wireless-N Access Point WNAP320 Reference Manual
Wireless Equipment Placement and Range Guidelines
The operating distance or range of your wireless connection can vary significantly based on
the physical placement of the product family. The latency, data throughput performance, and
notebook power consumption of wireless adapters also vary depending on your configuration
choices.
Note: Failure to follow these guidelines can result in significant
performance degradation or inability to wirelessly connect to the
access point. For complete performance specifications, see
Appendix A, Supplemental Information.
For best results, place your product family:
• Near the center of the area in which your PCs will operate.
• In an elevated location such as a high shelf where the wirelessly connected PCs have
line-of-sight access (even if through walls).
• Away from sources of interference, such as PCs, microwaves, and 2.4 GHz cordless
phones.
• Away from large metal surfaces.
• Putting the antenna in a vertical position provides best side-to-side coverage. Putting the
antenna in a horizontal position provides best up-and-down coverage.
A wall mount kit is provided with your product family. For installation instructions, see
Mounting the ProSafe Wireless Access Point Using the Wall Mount Kit (Optional) on
page 26.
If using multiple access points, it is better if adjacent access points use different radio
frequency channels to reduce interference. The recommended channel spacing between
adjacent access points is five channels (for example, use channels 1 and 6, or 6 and 11).
The time it takes to establish a wireless connection can vary depending on both your security
settings and placement. Some types of security connections can take slightly longer to
establish and can consume more battery power on a notebook computer.
Cabling Requirements
The ProSafe Wireless Access Point connects to your LAN via twisted-pair Category 5
Ethernet cable with RJ-45 connectors.
Default Factory Settings
When you first receive your WNAP320, the default factory settings will be set. You can
restore these defaults with the Factory Default Restore switch on the rear panel .To restore