
User's Manual
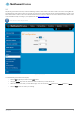
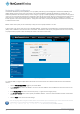
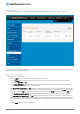
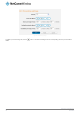

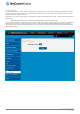
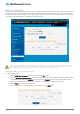


Table Of Contents
- Introduction
- Target audience
- Prerequisites
- Notation
- Product overview
- Product features
- Package contents
- Physical dimensions
- LED indicators
- Ethernet port LED indicators
- Interfaces
- Mounting options
- DIN rail mounting bracket
- Wall mounted via DIN rail bracket
- DIN rail mount
- Pole mount using DIN rail bracket
- Desk mount
- Powering the router
- Installing the router
- Data Connection
- Connect on demand
- SIM Management
- Operator settings
- SIM security settings
- LAN
- Wireless settings
- Ethernet LAN/WAN
- WAN failover
- Routing
- VPN
- Dynamic DNS
- Network time (NTP)
- Data stream manager
- PADD
- SNMP
- TR-069
- GPS
- USSD
- IO configuration
- SMS messaging
- Diagnostics
- Sending an SMS Diagnostic Command
- Log
- System configuration
- Administration
- Watchdogs
- Power management
- USB-OTG
- Storage
- Reboot
- Restoring factory default settings
- Accessing recovery mode
- Status
- Log
- Application Installer
- Settings
- Reboot
- Overview
- Accessing USB/SD card storage devices
- Host and Device mode

www.netcommwireless.com
NetComm Wireless 4G WiFi M2M Router
51
UM-00009
RIP
RIP (Routing Information Protocol) is used for advertising routes to other routers. Thus all the routes in the router’s routing table will
be advertised to other nearby routers. For example, the route for the router’s Ethernet subnet could be advertised to a router on the
PPP interface side so that a router on this network will know how to route to a device on the router’s Ethernet subnet. Static routes
must be added manually according to your requirements. See Adding Static Routes.
Note: Some routers will ignore RIP.
Figure 60 - RIP configuration
To enable Routing Information Protocol (RIP)
1.
Click the RIP toggle key to switch it to the ON position.
2.
Using the Version drop down list, select the version of RIP that you would like to use.
3.
Select the interface for which you want RIP to apply. You can choose the LAN interface, the WWAN interface or BOTH.
4.
Click the Save button to confirm your settings.