
- NetComm Modem Router User Guide
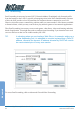
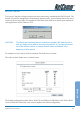
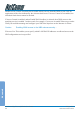

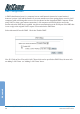
Table Of Contents
- Contents
- Overview
- NB5 Package Contents Note
- Minimum System Requirements
- Front Indicators
- Back Panel
- Resetting Factory Defaults
- Do I need a Micro filter?
- Default Settings
- Quick Start Guide
- Connecting your NB5 ADSL Modem via ETHERNET
- Connecting your NB5 ADSL Modem via USB
- Setting up your ADSL Router
- Log into your ADSL Router
- Quick Start Menu
- Connecting your ADSL Router
- Step 1: Connecting the ADSL Router to Your Computer/Notebook
- Step 1.1 Connecting to the Ethernet/USB
- Step 1.2 Connecting to the ADSL Line
- Step 1.3 Connecting to the Power Outlet
- Step 1.4 Powering On
- Step 2: Configuring Your Ethernet Network Card / Installing Your USB Device
- 2.1 Configuring Your Ethernet Network Card
- 2.2 Installing the USB Device Driver
- Step 3: Configuring Your Internet Browser
- Step 4: Connecting to the Internet
- Firewall Configuration
- Introduction to Firewalls
- Network Address Translation and Port Mapping
- Dedicated Firewalls
- Advanced Configuration of your ADSL Router
- Log into your ADSL Router
- Advanced Configuration of your ADSL Router-Login Settings
- Advanced Menus
- Introduction to Setup and Advanced Menus
- Configuring the ADSL Connection
- The Setup Menu
- WAN Setup
- PPPoE Connection
- PPPoA Connection Setup
- DHCP Connection Setup
- Static Connection Setup
- Bridged Connection Setup
- CLIP [Classical IP over ATM] Connection Setup
- LAN Setup
- DHCP Configuration
- Management IP
- The Advanced Menu
- UPnP
- SNMP
- IP QoS
- LAN Clients
- MAC Filter Control
- Enable/Disable MAC Filtering
- Create MAC Filter Rules
- Edit or Delete MAC Filter Rules
- Hidden MAC Filter Rules
- Multicasting
- Static Routing
- Dynamic Routing
- Port Forwarding
- Access Control
- IP Filters
- DMZ Configuration
- Tools Menu
- System Commands
- User Management
- Update Firmware
- Ping Test
- Modem Test
- Reboot
- Log Out
- Status Menu
- Network Statistics
- Connection Status
- DHCP Clients
- Modem Status
- Product Information
- System Log
- Appendix A: Troubleshooting
- The ADSL Router is not functional
- I can't connect to the ADSL Router.
- The DSL Link LED continues to blink but does not go solid
- The DSL Link LED is always off
- Appendix B: ADSL Router terms
- What is a firewall?
- What is NAT?
- What is a DMZ?
- What is a Gateway?
- Appendix C: Features
- ADSL/ATM Support
- Encapsulation Support
- Network Support
- Management Support
- Security Support
- External Connectors:
- Appendix D: Cable Connections
- RJ-45 Network Ports
- Twisted pair cables
- Straight and crossover cable configuration
- RJ11 connector and cable
- 605 to RJ-11 adapter
- USB cable
- 9 Pin (RS-232 ) Serial Cable
- Appendix E: Registering your NetComm Product
- Contact Information
- Legal & Regulatory Information
- Product Warranty
Advanced
NetComm NB5 Ethernet/USB Modem Router YML717 Rev1
64 www.netcomm.com.au
To create a New Port Forward Rule:
On the Port Forwarding page shown in the figure above, click on the User radio button, then on the
New Button.
Rule Name: enter a name that identifies the rule; for the sake of clarity this will usually be the name
of the application. The name must be unique, must not contain spaces and cannot begin with a
number.
Protocol: can be either TCP or UDP, or both.
Port start…port end: These will be the same if you are forwarding only a single port. If there is a
range, then port start is the first number in the range, and port end will be the last number.
Port Map: this is the port number that the data should be forwarded to on the specified LAN IP (i.e.
the inside port). This is usually the same as the port start figure.
TIP: It is possible to map outside port numbers, or ranges [i.e. port start…port end] to a different
inside port numbers [port map] for reasons of security or convenience.
Click 'Apply'
The Port Rule settings defined by this process will then be displayed in a table at the bottom of the
Rule Management panel.
If you wish to add more ports to this rule, leave the text name in the Rule Name field and enter the
new port settings. Click 'Apply' and the new settings will be added to the list.
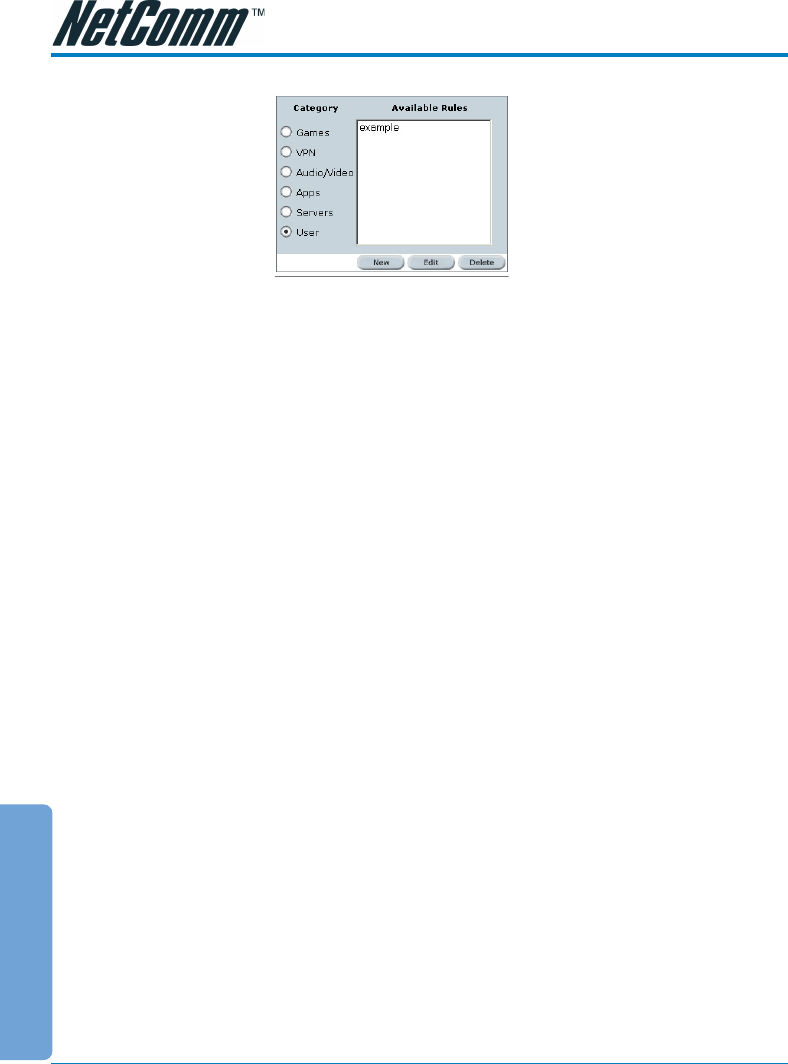
Adding Custom Rules to Applied Rules List
When you have assigned all necessary ports to the Rule and they appear in the table, click on the
Port Forwarding menu item to return to the main Port Forwarding screen.
User-created rules will be shown in the Available Rules list when the User Category radio button is
selected. You can now apply the rule(s) by selecting it and clicking Add. This will add the rule to list
of applied rules.
Click on Save Settings on the left-hand menu to make changes permanent.