
Installation Instructions
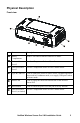


NetBotz Wireless Sensor Pod 180 Installation Guide
9
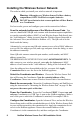
Power the Routers. Power each Router using the included AC-USB
adapter, not directly connected to the NetBotz appliance. To limit traffic on the
network, do not power the Routers until after the Coordinator is powered and
configured.
Power the End Devices. Insert the included batteries into End Devices. To
preserve battery life, do not insert the batteries into the End Devices until after
the Coordinator and the Routers are powered, and the Coordinator is
configured. Battery life is estimated at up to 5 years under normal use.
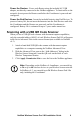
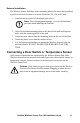
Scanning with a USB QR Code Scanner
When you use a USB QR code scanner with document capture capabilities,
only the extended address (MAC) of each Wireless Sensor Pod 180 will appear
in the list in Advanced View in the correct format (not available in NetBotz
v4.3).
1. Attach a hand-held USB QR code scanner with document capture
capabilities to a computer running the NetBotz Advanced View.
2. With the Advanced View open to the “Add Addresses” dialog in the
Wireless Sensor Setup task, scan the QR code on the label of each
Wireless Temperature Sensor.
3. Click Apply Commission List to save the list to the NetBotz appliance.
Note: Depending on the NetBotz v4.4 appliance, you can add up
to 26 or up to 48 wireless devices to your wireless sensor network.
In NetBotz v4.3, you can add up to 26 Wireless Sensor Pod 180s
only, including the Coordinator.