
Installation Instruction

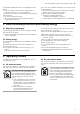
Table Of Contents
- Extractor hood
- en
- Table of contents
- 1 Safety
- 2 Avoiding material damage
- 3 Environmental protection and saving energy
- 4 Operating modes
- 5 Familiarising yourself with your appliance
- 6 Basic operation
- 6.1 Switching on the appliance
- 6.2 Switching off the appliance
- 6.3 Selecting a fan setting
- 6.4 Switching on intensive mode
- 6.5 Switching off intensive mode
- 6.6 Switching on the fan run-on
- 6.7 Switching off the fan run-on
- 6.8 Switching on the NoiseReduction function
- 6.9 Switching on the AirFresh function
- 6.10 Switching on automatic mode
- 6.11 Switching off automatic mode
- 6.12 Sensor control
- 6.13 Setting the sensor control
- 6.14 Setting the saturation indicator
- 6.15 Switching on the lighting
- 6.16 Setting the brightness
- 6.17 Switching on the audible signal
- 6.18 Switching off the signal tone
- 7 Home Connect
- 8 Hob-based hood control
- 9 Cleaning and servicing
- 10 Troubleshooting
- 11 Disposal
- 12 Customer Service
- 13 Accessories
- 14 Declaration of Conformity
- 15 Installation instructions
- 15.1 Scope of delivery
- 15.2 Safety clearances
- 15.3 Secure installation
- 15.4 General information
- 15.5 Instructions for the electrical connection
- 15.6 Information on the installation situation
- 15.7 Instructions for the exhaust air pipe
- 15.8 Instructions for the air extraction mode
- 15.9 Installation

Cleaning and servicing en
9
¡ Please note the safety precautions in the instruction
manual for your appliance and ensure that they are
also observed when operating the appliance via the
hob-based hood control.
¡ Operating your appliance always takes priority. It is
not possible to use the hob-based hood control dur-
ing this time.
¡ In networked standby mode, the appliance requires
a maximum of2W.
¡ You can only connect to the extractor hood via the
HomeConnect app. Other connection routes are no
longer supported.
9 Cleaning and servicing
To keep your appliance working efficiently for a long
time, it is important to clean and maintain it carefully.
9.1 Cleaning products
You can obtain suitable cleaning products from after-
sales service or the online shop.
ATTENTION!
Unsuitable cleaning products may damage the sur-
faces of the appliance.
▶ Do not use harsh or abrasive detergents.
▶ Do not use cleaning products with a high alcohol
content.
▶ Do not use hard scouring pads or cleaning
sponges.
▶ Only use glass cleaners, glass scrapers or stainless
steel care products if recommended in the cleaning
instructions for the relevant part.
▶ Wash sponge cloths thoroughly before use.
9.2 Cleaning the appliance
Clean the appliance as specified. This will ensure that
the different parts and surfaces of the appliance are
not damaged by incorrect cleaning or unsuitable clean-
ing products.
WARNING‒Risk of explosion!
Highly caustic alkaline or highly acidic cleaning agents
in conjunction with aluminium parts in the interior of the
appliance may cause explosions.
▶ Never use highly caustic alkaline or highly acidic
cleaning agents. In particular, do not use commer-
cial or industrial cleaning agents in conjunction with
aluminium parts, e.g. grease filter on extractor
hoods.
WARNING‒Risk of electric shock!
An ingress of moisture can cause an electric shock.
▶ Before cleaning, pull out the mains plug or switch
off the fuse in the fuse box.
▶ Do not use steam- or high-pressure cleaners to
clean the appliance.
WARNING‒Risk of burns!
The appliance becomes hot during operation.
▶ Allow the appliance to cool down before cleaning.
WARNING‒Risk of injury!
Components inside the appliance may have sharp
edges.
▶ Carefully clean the appliance interior.
1.
Observe the information regarding the cleaning
agents.
2.
Clean as follows, depending on the surface:
‒ Clean stainless steel surfaces in the direction of
the finish using a sponge cloth and hot soapy
water.
‒ Clean painted surfaces using a damp sponge
cloth and hot soapy water.
‒ Clean aluminium using a soft cloth and glass
cleaner.
‒ Clean plastic using a soft cloth and glass
cleaner.
‒ Clean glass using a soft cloth and glass cleaner.
3.
Dry with a soft cloth.
4.
Apply a thin layer of the stainless steel cleaning
product to stainless steel surfaces using a soft
cloth.
You can obtain stainless steel cleaning products
from the after-sales service or the online shop.
9.3 Cleaning controls
WARNING‒Risk of electric shock!
Penetrating moisture may cause an electric shock.
▶ Do not use wet sponge cloths.
1.
Observe the information regarding the cleaning
agents.
2.
Clean using a damp sponge cloth and hot soapy
water.
3.
Dry with a soft cloth.
9.4 Removing the grease filter
1.
ATTENTION!
Falling grease filters may damage the hob below.
▶ Grip below the grease filter with one hand.
Open the lock on the grease filter and fold down the
grease filter.
2.
Remove the grease filters from the holders.
To prevent grease from dripping, hold the grease fil-
ter horizontally.