
Installation instructions
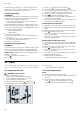
Table Of Contents
- Oven
- en
- Table of contents
- 1 Safety
- 2 Preventing material damage
- 3 Environmental protection and saving energy
- 4 Familiarising yourself with your appliance
- 5 Accessories
- 6 Before using for the first time
- 7 Basic operation
- 7.1 Switching on the appliance
- 7.2 Switching off the appliance
- 7.3 Residual heat indicator
- 7.4 Setting the type of heating and temperature
- 7.5 Changing the temperature
- 7.6 Changing the type of heating
- 7.7 Pausing operation
- 7.8 Cancelling operation
- 7.9 Viewing the current temperature
- 7.10 Displaying information
- 8 Steam
- 9 Time-setting options
- 10 Meat probe
- 11 Baking and roasting assistant
- 12 Steam programs
- 13 Childproof lock
- 14 Rapid heat-up
- 15 Sabbath mode
- 16 Basic settings
- 17 Home Connect
- 18 Cleaning and servicing
- 19 Cleaning function
- 20 Rails
- 21 Appliance door
- 22 Troubleshooting
- 23 Disposal
- 24 Customer Service
- 25 Declaration of Conformity
- 26 How it works
- 26.1 General cooking tips
- 26.2 Baking tips
- 26.3 Roasting, braising and grilling tips
- 26.4 Steaming
- 26.5 Cooking frozen products
- 26.6 Cooking ready meals
- 26.7 List of foods
- 26.8 Special cooking methods and other applications
- 26.9 Test dishes
- 27 Installation instructions
- 27.1 General installation instructions
- 27.2 Appliance dimensions
- 27.3 Installation below a worktop
- 27.4 Installation underneath a hob
- 27.5 Installation in a tall unit
- 27.6 Installing two appliances on top of each other
- 27.7 Corner installation
- 27.8 Electrical connection
- 27.9 Installing the appliance
- 27.10 Removing the appliance

Cleaning and servicing en
27
Using oven cleaner in a hot cooking compartment
damages the enamel.
▶ Never use oven cleaner in the cooking compartment
when it is still warm.
▶ Remove all food remnants from the cooking com-
partment and the appliance door before you next
heat up the appliance.
New sponge cloths contain residues from production.
▶ Wash new sponge cloths thoroughly before use.
Suitable cleaning agents
Only use cleaning agents that are suitable for the differ-
ent surfaces on your appliance.
Follow the instructions on cleaning the appliance.
→"Cleaning the appliance", Page28
Appliance front
Surface Suitable cleaning agents Information
Stainless steel ¡ Hot soapy water
¡ Special stainless steel
cleaning products
suitable for hot sur-
faces
To prevent corrosion, remove any limescale, grease, starch or albu-
min (e.g. egg white) stains on stainless steel fronts immediately.
Apply a thin layer of the stainless steel cleaning product with a soft
cloth.
Plastic or painted
surfaces
E.g. control panel
¡ Hot soapy water Do not use glass cleaner or a glass scraper.
To avoid permanent stains, remove any descaling agent that gets
onto the surface immediately.
Appliance door
Area Suitable cleaning agents Information
Door panels ¡ Hot soapy water Do not use a glass scraper or a stainless steel wool.
Tip:Remove the door panels in order to clean them thoroughly.
→"Appliance door", Page31
Door cover ¡ Made of stainless
steel:
Stainless steel cleaner
¡ Made of plastic:
Hot soapy water
Do not use glass cleaner or a glass scraper.
Do not use stainless steel care products.
Tip:Remove the door cover for thorough cleaning.
→"Appliance door", Page31
Stainless steel in-
terior door frame
Stainless steel cleaner Discolouration can be removed using stainless steel cleaner.
Do not use stainless steel care products.
Door handle ¡ Hot soapy water To avoid permanent stains, remove any descaling agent that gets
onto the surface immediately.
Door seal ¡ Hot soapy water Do not remove or scrub.
Cooking compartment
Area Suitable cleaning agents Information
Enamel surfaces ¡ Hot soapy water
¡ Vinegar water
¡ Oven cleaner
Soak any heavily soiled areas and use a brush or steel wool.
Leave the appliance door open to dry the cooking compartment
after cleaning it.
Notes
¡ Enamel burns at very high temperatures, causing minor discol-
ouration. The functionality of your appliance is not affected by
this.
¡ The edges of thin trays cannot be completely enamelled and may
be rough. This does not impair corrosion protection.
¡ Food residues will leave a white coating on the enamel surfaces.
The coating does not pose a health risk. The functionality of your
appliance is not affected by this. You can remove residues with
lemon juice.
Self-cleaning sur-
faces
- Follow the instructions for self-cleaning surfaces.
→"Cleaning self-cleaning surfaces in the cooking compartment",
Page28
Glass cover for
the oven light
¡ Hot soapy water Use oven cleaner to remove very heavy soiling.