
Operation Manual


TIP:
UninstallingVirtualRemoteTool
Preparation:
ExitVirtualRemoteToolbeforeuninstalling.TouninstallVirtualRemoteTool,theWindowsuseraccountmusthave
“Administrator” privilege(Windows7,WindowsVista andWindows2000)or“Computer Administrator”privilege
(WindowsXP).
•ForWindows7/WindowsVista
1 Click “Start” and then “Control Panel”.
TheControlPanelwindowwillbedisplayed.
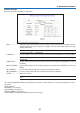
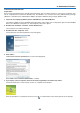
2 Click “Uninstall a program” under “Programs”
The“ProgramsandFeatures”windowwillbedisplayed.
3 Select Virtual Remote Tool and click it.
4 Click “Uninstall/Change” or “Uninstall”.
•Whenthe“UserAccountControl”windowsisdisplayed,click“Continue”.
Followtheinstructionsonthescreenstocompletetheuninstallation.
•ForWindowsXP/2000
1 Click “Start” and then “Control Panel”.
TheControlPanelwindowwillbedisplayed.
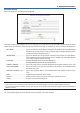
2 Double-click “Add / Remove Programs”.
TheAdd/RemoveProgramswindowwillbedisplayed.
•OnWindows2000,double-click“Uninstallaprogram”.
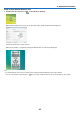
3 Click Virtual Remote Tool from the list and then click “Remove”.
Followtheinstructionsonthescreenstocompletetheuninstallation.
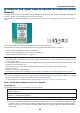
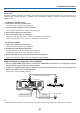
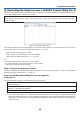
Step 2: Connect the projector to the computer
1 Use the supplied VGA signal cable to connect the COMPUTER 1 IN connector of the projector directly
with the monitor output connector of the computer.
2 Connect the supplied power cable to the AC IN of the projector and the wall outlet, and then press the
Main Power switch to turn on the main power.
Theprojectorisinthestandbycondition.
COMPUTER 1 IN
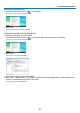
TIP:
• WhenVirtualRemoteToolstartsforthersttime,“EasySetup”windowwillbedisplayedtonavigateyourconnections.
ACInput
MainPowerSwitch
VGAsignalcable(supplied)
→
Towalloutlet
Powercable(supplied)
45
4. Convenient Features