
Operation Manual


30
3. Projecting an Image (Basic Operation)
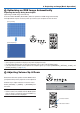
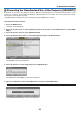
Optimizing an RGB Image Automatically
Adjusting the Image Using Auto Adjust
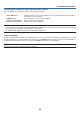
OptimizinganRGBimageautomatically.
PresstheAUTOADJUST(AUTOADJ.)buttontooptimizeanRGBimageautomatically.
Thisadjustmentmaybenecessarywhenyouconnectyourcomputerforthersttime.
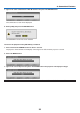
[Poorpicture]
[Normalpicture]
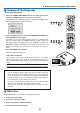
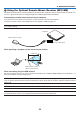
SoundlevelfromthespeakerandtheAUDIOOUT
jack(Stereomini)ontheprojectorcanbeadjusted.
Anotherwaytoadjustvolumeistousethemenu.
Select[ADJUST]
→
[AUDIO]
→
[VOLUME] from
the menu.
NOTE:
• Volumecontrolisnotavailablewiththe
or
button
whenanimageisenlargedbyusingtheMAGNIFY(+)
button or when the menu is displayed.
NOTE:
• Somesignalsmaytaketimetodisplayormaynotbedisplayedcorrectly.
• TheAutoAdjustfunctiondoesnotworkforcomponent,video,S-video,andDVIdigitalsignals.
• Ifthe AutoAdjust operation cannotoptimizethe computer signal, try toadjust [HORIZONTAL],[VERTICAL], [CLOCK], and
[PHASE]manually.(
→
page 58, 59)
Adjusting Volume Up & Down
Increasevolume
Decreasevolume