
Operation Manual


23
... English
Introduction
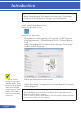
5 Click “Open” in the dialog box. If prompted, enter an administrator name
and password.
The installer will start.
6 Click “Next”.
“END USER LICENSE AGREEMENT” screen will be displayed.
7 Read “END USER LICENSE AGREEMENT” and click “Next”.
The conrmation window will be displayed.
8 Click “I accept the terms in the license agreement”.
Follow the instructions on the installer screens to complete the installation.
Step 2: Connect the projector to a LAN
Connect the projector to the LAN by following the instructions in “Connect-
ing the Projector” (-> page 25)
Step 3: Start PC Control Utility Pro 5
1. Open your Applications folder in Mac OS.
2. Click the “PC Control Utility Pro 5” folder.
3. Click the “PC Control Utility Pro 5” icon.
PC Control Utility Pro 5 will start.
TIP: Viewing the Help of PC Control Utility Pro 5
• Displaying the Help le of PC Control Utility Pro 5 while it is running.
• From the menu bar, click “Help” → “Help” in this order.
The Help screen will be displayed
• Displaying the Help using the Dock
1. Open “Application Folder” in Mac OS.
2. Click the “PC Control Utility Pro 5” folder.
3. Click the “PC Control Utility Pro 5 Help” icon.
The Help screen will be displayed.
TIP: Uninstalling a software program
1. Put the “PC Control Utility Pro 5” folder to the Trash icon.
2. Put the conguration le of PC Control Utility Pro 5 to the Trash icon.
• The conguration le of PC Control Utility Pro 5 is located in “/Users/
<your user name>/Application Data/NEC Projector User Supportware/
PC Control Utility Pro 5”.
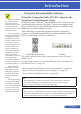
For the Schedule
function of the PC
Control utility Pro 5 to
work, you must have
your computer run-
ning and not in sleep
mode. Select “En-
ergy Saver” from the
“System Preferences”
in Mac and disable its
sleep mode before run-
ning the scheduler.
When [POWER-
SAVING] is se-
lected for [STANDBY
MODE] from the
menu, the projector
cannot be turned on
via the network.