
Operation Manual


32
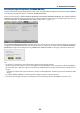
3. Convenient Features
Correcting Horizontal and Vertical Keystone Distortion [COR-Correcting Horizontal and Vertical Keystone Distortion [COR-
NERSTONE]
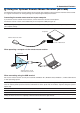
Usethe3DReformfeaturetocorrectkeystone(trapezoidal)distortiontomakethetoporbottomandtheleftorright
sideofthescreenlongerorshortersothattheprojectedimageisrectangular.
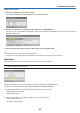
Cornerstone
1. Pressandholdthe3DREFORMbuttonforaminimumof2secondstoresetcurrentadjustments.
Current adjustments for [KEYSTONE] or [CORNERSTONE] will be cleared.
2. Project an image so that the screen is smaller than the area of the raster.
3. Pickupanyoneofthecornersandalignthecorneroftheimagewithacornerofthescreen.
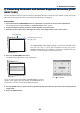
Projected image
The drawing shows the up-
per right corner.
4. Pressthe3DREFORMbuttontwice.
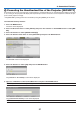
The Cornerstone adjustment screen is displayed.
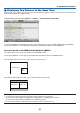
5. Use the buttontoselectoneicon()whichpointsinthedirectionyouwishtomovetheprojected
image frame.
6. PresstheENTERbutton.
TIP: If you are adjusting [KEYSTONE], [CORNERSTONE] will not be
available.Ifthishappens,pressandholdthe3DREFORMbuttonfora
minimumof2secondstoresetthe[KEYSTONE]adjustments.
The drawing shows the upper left
icon ( ) is selected.
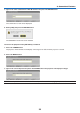
TIP:PA600X/PA500X:When[WIDESCREEN]isselectedfrom [SCREEN TYPE],
lines that show “16:9”or “16:10” will be displayed. Click the outer corners.
PA550W/P-PA500U:When[4:3SCREEN]isselectedfrom[SCREENTYPE],lines
thatshow“4:3”willbedisplayed.Clicktheoutercorners.