
User's Manual

28
5. Performing Stacking/Tiling Correction
Test images for the number of projectors connected will be sent and projected.
* T
he web camera photographs the screen on which the test image is projected, and this is used as
the calculation data for stacking/tiling corre
ction.
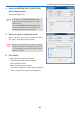
Wh
en an error message is displayed at the time of sending the test image, and calibration cannot be
complete
d, please see "Calibration" ( Page 37), and "Error Message List" ( Page 39).
T
here will be a return to the Multi Screen Tool screen upon completion of the calibration.
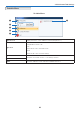
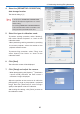
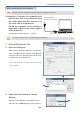
9. Click [OK]
With this, the stacking/tiling correction will be completed when using the web camera.
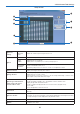
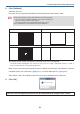
First: Completely black image Second: Completely white image
Third: Image of dots (Five dots at screen center) Fourth: Image of dots (Screen full of dots)
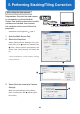
8. Click [Calibrate]
Calibration will start.
Fo
ur types of test image (illustrated below) will be projected onto the screen in order.
• During the calibration, please pay attention to the following points:
- D
o not touch the installation platform of the camera or projector.
- D
o not cut across in front of the camera.
- D
o not let shadows from outside light fall upon the screen.
• Pre
ss the ESC key on the keyboard to cancel calibration.
Note