
User Manual

29
Chapter 4 Gettings Items Into Neat 5: Scanning, Importing and Sending
4
Gettings Items Into Neat 5: Scanning, Importing
and Sending
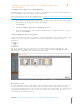
Importing a PDF
1. In the Folder Navigation pane, click on a folder. (This is where the imported item will be
stored. You also have the option of creating a new folder.)
2. Click Import.
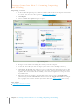
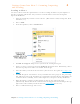
3. Choose PDF. The Selected PDFs dialog box opens.
Selec ted PDFs Dialog Box
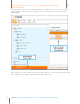
4. Click Browse and navigate to the folder containing the PDF(s) you want to import.
5. Select the PDF(s) you wish to import. (Use the Ctrl key to select multiple items.)
6. Click the Item Type dropdown menu and choose the type of item you are importing.
Alternatively, choose Auto-detect imported item to let Neat 5 determine the item type.
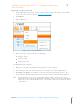
7. Click OK. The Queue icon animates to let you monitor the importing progress. The
processing time for importing will vary based on the number of items, document size, and
amount of content. Neat 5 will optimize the scanned item for readability, convert it into
digital text, and parse it for key information.
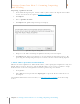
8. When the import is complete, double-click on an item to view it in Details View.
(Alternatively, click the Details View button under the Toggle Item View heading in the top
right corner of the window.) Details in this view can be edited if necessary.
9. Choose a different item type if necessary.