
User Manual

26
Chapter 4 Gettings Items Into Neat 5: Scanning, Importing and Sending
4
Gettings Items Into Neat 5: Scanning, Importing
and Sending
Scanning Separate Pages vs. Scanning Multi-Page
By default, Neat 5 scans each item as a separate receipt, business card or document. However,
you scan multiple pages into a single receipt or document.
These instructions are for the Neat Mobile Scanner. Click here for instructions on scanning a multi-
page document using the Neat Desktop Scanner.
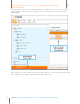
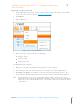
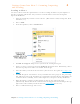
1. In the Folder Navigation pane, click on a folder. (This is where the new item will be stored.
You also have the option of creating a new folder.)
2. Click Settings.
3. Click in the Combine pages into a single item checkbox.
4. Feed the item into the scanner and then click Scan. Neat 5 will prompt you for each page
until you click Complete.
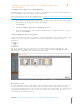
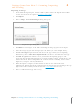
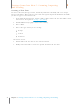
Understanding the Processing Queue
As you scan an item, the
Queue
icon animates to let you monitor the scan’s progress. Neat 5 will
optimize the scanned item for readability, convert it into digital text, and parse it for key
information.
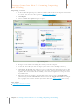
The processing time for a scan will vary based on the number of items, document size, and
amount of content. Clicking on the Queue icon opens a separate Processing Queue window
which displays a thumbnail view of each item being scanned.
Proc essing Queue Window
Reviewing a Scan
As an item is scanned, Neat 5 will optimize it for readability, convert it into digital text, and parse
it for key information. The accuracy of this process depends on the quality of the item being
scanned. For example, if the text on a receipt is very light or the vendor name on a business card
is in a highly stylized font, Neat 5 may not be able to read every detail clearly. Therefore, each
scan should be reviewed for accuracy.