
User Manual

133
Chapter 7 Exporting, Reporting & Printing
7
Exporting, Reporting & Printing
SYNCING
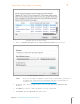
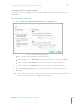
1. Choose Sync with Outlook from the Tools menu. A progress bar displays where you are in
the process. The greater the number of contacts to be synchronized, the longer the
process will be.
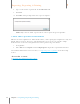
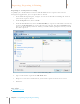
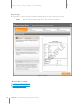
2. If new contacts are going to be created in Neat as a result of the synchronization
process, a dialog box will prompt you to choose (or create) a folder where the new
contacts will be stored. Select a folder and then on OK.
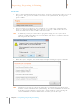
TIP: In Outlook, you may be alerted that a program is trying to access your email
addresses. Click in the Allow access for checkbox and choose 10 minutes from the
time dropdown list. Click Yes.
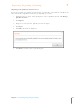
3. When the sync is complete, the Outlook Sync Completed dialog box opens. Click OK.
TIP: Syncing does not delete contacts in either Neat 5 or Outlook. For example, if you
delete a contact in Outlook after synchronizing, the contact will NOT be deleted the
next time you sync. Likewise, if you delete a contact in Neat 5 after syncing, the
contact will NOT be deleted in Outlook the next time you run the sync.