
User Manual


125
Chapter 7 Exporting, Reporting & Printing
7
Exporting, Reporting & Printing
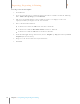
Exporting to Quicken
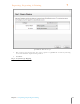
NOTE: If you are exporting to a Quicken account for the very first time, you will need
to facilitate the connection between Quicken and Neat 5 by importing an
account. See Importing Your Quicken Account to Neat.
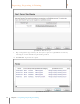
1. In the Folder Navigation pane, navigate to and select the folder or items you want to
export to Quicken.
2. From the Export menu, choose Quicken.
3. From the Quicken submenu, choose Selected Folder (to export an entire folder of
receipts) or choose Selected Items (to export only selected receipts).
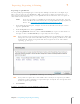
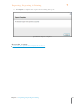
NOTE: If an exported receipt is missing important information, the Validating Data
dialog box will open to alert you of what should be fixed prior to exporting. To
fix the issue, click Cancel and the edit the receipt in Details View. To ignore the
issue and continue exporting, go to Step 4.
Validating Data
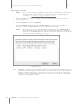
TIP: Quicken has shorter character limits than Neat for the Category (40), Tran ID (12) and
Comments (64) fields. If any of your receipts contain data that exceeds those limits, a
dialog box will open listing those receipts. You can choose to cancel the export and
edit the receipts in question or click Continue to have the data in those receipt fields
truncated to fit the Quicken limits.