
User Manual


118
Chapter 7 Exporting, Reporting & Printing
7
Exporting, Reporting & Printing
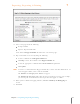
Exporting to QuickBooks
You can quickly export multiple types of receipts into multiple accounts in a few simple steps.
These exports appear in your QuickBooks “Bills” section. Neat 5 makes it quick and easy to
connect Category and Payment type to your QuickBooks Chart of Accounts. You can export an
entire folder or selected items.
NOTE: If you are exporting to a QuickBooks account for the very first time, you will
need to facilitate the connection between your QuickBooks Company File and
Neat 5. See Connecting Your QuickBooks Company File to Neat.
1. In the Folder Navigation pane, navigate to and select the folder or items you want to
export to QuickBooks.
2. From the Export menu, choose QuickBooks.
3. From the QuickBooks submenu, choose Selected Folder (to export an entire folder of
receipts) or choose Selected Items (to export only selected receipts).
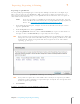
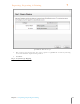
TIP: If an exported receipt is missing important information, the Validating Data dialog box
will open to alert you of what should be fixed prior to exporting. To fix the issue, click
Cancel and the edit the receipt in Details View. To ignore the issue and continue
exporting, go to Step 4.
Quic kBooks Validating Data Dialog Box
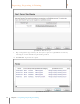
TIP: If any of the receipts in the selected folder have already been exported, you will be
prompted to choose whether to export all receipts or only the new receipts that have
not been exported previously.
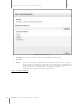
4. Click Continue.
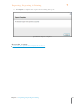
In Step 1: You will select your QuickBooks Company File