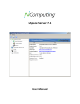
vSpace Server 7.
vSpace Server 7.1 User Manual Important Notices Please note that reproduction of this User Manual in whole or in part, without express written permission from NComputing, is not permitted.
vSpace Server 7.1 User Manual Microsoft® Windows® Licenses. You are licensed by NComputing to use the vSpace Server software under the terms of the EULA. You must also acquire the appropriate number of Windows Server licenses and Client Access Licenses for each device or user accessing Windows Server software.
vSpace Server 7.1 User Manual TABLE OF CONTENTS Important Notices ........................................................................................................................................ 2 1.0 Getting Started ...................................................................................................................................... 5 1.1 Installing vSpace ...............................................................
vSpace Server 7.1 User Manual 1.0 Getting Started Before beginning, make sure you’ve downloaded the latest version of vSpace for your selected operating system. For the purpose of this document we will be using vSpace 7.0 in conjunction with the L300 and M300 access devices.
vSpace Server 7.1 User Manual 1.2 Server Install Order vSpace Server 7 introduces several advanced management features and was engineered to work hand-‐ in-‐hand with vSpace Management Center, NComputing’s central management application. The following are recommended installation steps for vSpace-‐only, and vSpace + vSpace Management Center deployments.
vSpace Server 7.1 User Manual 1.3 Registering vSpace Once vSpace is installed, register the host software by right-‐clicking on the NComputing icon in your system tray and selecting “vSpace Registration,” as shown in the image to the right.
vSpace Server 7.1 User Manual 1.5 Management Zones vSpace 7 organizes vSpace servers and NComputing access devices into Management Zones. Each zone can be comprised of several vSpace 7 servers, vSpace Management Center servers, and devices and exist within a single subnet or span multiple network segments.
vSpace Server 7.1 User Manual 2.0 NComputing vSpace 2.1 vSpace Information Launch the vSpace Management Console by navigating from the Windows Start button to “NComputing vSpace,” and then click on “NC-‐Console.
vSpace Server 7.1 User Manual 2.2 License Information Left-‐click on the “License Information” section of the left navigation tree to display licensing information for the vSpace software on your host.
vSpace Server 7.1 User Manual 2.3 System Settings -‐ Common Left-‐click on the “System Settings” section of the left navigation tree to display settings that affect the host, as well as devices that connect to it.
vSpace Server 7.1 User Manual Start NC Console from NC Tray This setting determines whether the NC Console can be opened from the NC Tray icon in the task bar. Display Desktop Wallpapers Enabling this feature will allow device users to select and display custom Desktop Backgrounds within their Windows sessions.
vSpace Server 7.1 User Manual USB Support for L-‐ Series/M-‐series Devices Enables or disables USB support for L-‐series and M-‐series devices. While the feature on this page is a global setting, per-‐device control is available as pictured in the right-‐click menu pictured in Section 5.0 of this manual.
vSpace Server 7.1 User Manual Assign Performance Profiles Allows the administrator to choose from a selection of custom performance profiles to be used in specific network environments. Advanced Provides additional advanced configuration options. (see section 2.6) 2.
vSpace Server 7.1 User Manual Menu animations Enabling this setting enables graphical elements within the OS such as window animations. Disabling this option can improve desktop performance. Use Windows themes Setting this to “Yes” enables advanced Windows themes and graphical elements. Disabling this setting can improve desktop performance.
vSpace Server 7.1 User Manual 3.0 Profiles Left-‐click on the “Profiles” section of the left navigation tree to display information on device profiles that have been saved for future use. You can edit or delete these profiles by right-‐clicking on them in the profile list on the right side of the console.
vSpace Server 7.1 User Manual 4.0 Sessions 4.1 Session Overview When one or more devices connects to your vSpace host, the “Sessions” section of the left navigation tree will be populated with a list of active sessions. Left-‐click on the “Sessions” section to display an overview of active sessions on the right side of the console.
vSpace Server 7.1 User Manual 4.2 Session Information In addition to the session summary, you can expand the “Sessions” section of the left navigation tree to reveal information about individual sessions. Select these sessions to display additional information on the sessions themselves.
vSpace Server 7.1 User Manual 4.3 Session Controls A number of controls that provide easy access to some common operations appear at the top of the console. These operations include the ability to remotely view a specific session or to send that session a message.
vSpace Server 7.1 User Manual 5.0 Device Management 5.1 Device List Clicking on the Devices category displays a list of devices that can be sorted by device model, using the drop-‐down menu towards the top of the menu.
vSpace Server 7.1 User Manual Double-‐click on any device to open the Device Settings menu. This menu contains the following sub menus, which are explained in detail in the pages that follow. (continued in Section 5.
vSpace Server 7.1 User Manual 5.3 Information Tab As outlined in section 5.1, double-‐clicking on a device within the Device category opens a configuration menu which can be used to alter the settings of individual devices.
vSpace Server 7.1 User Manual 5.4 Connections Tab The “Connections” tab provides several host configuration options that determine how the device finds and then connects to available hosts.
vSpace Server 7.1 User Manual 5.5 Login Tab The “Login” tab provides several configuration choices that determine how the device will behave once it connects to a given host system, including screen resolution and automatic login options. Note that the L-‐series and M-‐series Login configuration menus vary slightly as seen below.
vSpace Server 7.1 User Manual Screen Resolution Sets the screen resolution and color depth to be used by the device once it connects to a host. Note that for the M-‐series, all three clients in an M-‐series kit share the same resolution and color depth settings.
vSpace Server 7.1 User Manual 5.6 Network Tab The “Network” tab provides standard network configuration options, including a choice between static and dynamic IP acquisition. Interface Indicates the device’s network interface. Optimize for Indicates the type of network being used; LAN = Local Area Network.
vSpace Server 7.1 User Manual 5.7 Password Tab The “Password” tab provides the option of setting a password that will restrict future access to device configuration. Use this tab to enable and disable password protection. No Password for Setup Sets the device to be accessible for configuration by any user.
vSpace Server 7.1 User Manual 5.8 Update Tab The “Update” tab is used to check for and install (if available) firmware updates for the device. This tab allows you to select from several different update methods, and can be set to draw firmware updates from inside your network, or from an external FTP location.
vSpace Server 7.1 User Manual 5.9 Management Tab The “Management” tab allows administrators to associate devices with specific management servers. Automatic Enable this option to instruct the device to automatically join any management server it discovers within its network segment.
vSpace Server 7.1 User Manual 5.10 Search Settings and Columns The “Search Settings” and “Columns” features in the upper-‐right side of the Devices category provide additional tools for locating, sorting and displaying device information.
vSpace Server 7.1 User Manual 5.11 Configuration Profiles As of vSpace version L-‐6.5.1., the NComputing vSpace Console includes the ability to save device settings and apply those settings to other devices across the network.
vSpace Server 7.1 User Manual 5.13 Editing Profiles Once a profile is created, administrators can edit the profile in the same way they would apply changes to the settings of an individual device.
vSpace Server 7.1 User Manual 5.14 Applying Profiles To apply a saved profile to other devices, select one or more devices within the Device list and then right-‐click on any of the selected devices.
vSpace Server 7.1 User Manual 6.0 Administration The Administration category includes additional configuration options for the management zone itself, as well as other administrative options such as user profiles for varying degrees of access as well as vSpace Server Group options. 6.
vSpace Server 7.1 User Manual 6.2 vSpace Server Groups The second tab within the Administration category allows administrators to create, edit, or remove vSpace Server Groups. Right clicking within the server groups list allows you to add, edit, remove, and reorder server groups.
vSpace Server 7.1 User Manual 6.3 Users The Users tab allows administrators to create administrative accounts and provision them with either read-‐only, or full administrative access. Righ-‐clicking on a user account provides the option to add, edit, or remove user accounts. 6.
vSpace Server 7.1 User Manual 7.0 Common Tasks This section provides some examples of frequently-‐encountered administrative tasks that utilize many of the features outlined in the previous sections. 7.
vSpace Server 7.1 User Manual 7.2 Maintenance Tasks -‐ Performing a Firmware Update on an Active Device In this example, we will simulate performing a firmware update on a device that is currently in use. To do this we need to give the current user advanced notice of the impending update before proceeding.
vSpace Server 7.1 User Manual 7.3 Deployment Tasks – Installing and Configuring a new Computer Lab For this example, we will go through the steps of initially deploying a series of devices, verifying their connectivity and performing some initial configuration tasks.