
Product Manual


Page 9
(17.5V 8A) that provides an alternative method to charge the internal battery. It is designed to be
used with the optional NATURE POWER solar panels (please check our website for solar panel
options). If a non-NATURE POWER Solar Home and RV Kit panel is used, be sure the solar panel
is designed for a 12V battery system with 8A maximum current, 17.5V rated voltage and open
circuit voltage less than 26 VDC. Please refer to the specifications label on the solar panel before
connecting. Do not connect to a PV source capable of delivering more than 140W (17.5V 8A).
The solar charge controller is a fully automatic self-sustaining device that will initiate the charge
cycle only when solar power is available. It runs independently from the built-in AC charger. When
a solar panel is connected to the Solar Input port, the „Solar Charge‟ indicator located at the
display panel indicates the charging status of the internal battery.
Note: If insufficient charge capacity is available from the solar source, it is recommended to use
the built-in AC charger to complete the battery charging process through the utility once a month.
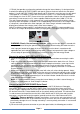
Solar Input port
WARNING: Shock, fire and energy hazards. Make sure the solar panel is covered with
an opaque sheet or facing the ground before connecting or disconnecting the cable wire to the
solar input port located at the back of the unit. All wiring must be done in accordance with
applicable local and national electrical wiring codes. Connect solar panel with higher voltage or
current rating will permanently damage the unit and may cause fire and energy hazard.
Connect to optional NATURE POWER Solar Panel:
Cover the solar panel with an opaque sheet or facing the ground before connecting the cable
wire.
Plug in the solar cable connector to the solar input port located at the back of the unit. Please
note the polarity of the connector before connected. Improper connections (reversing the wire
connection on the solar panel connection box) will cause the unit to malfunction and may
permanently damage the unit. Damage caused by a reverse polarity connection is not covered
by your warranty.
Remove the opaque sheet or flip the solar panel with solar cell surface facing upwards. Adjust
the mounting fringe of the solar panel to have the solar cell surface facing directly to the sunlight
to achieve the maximum power. When sunlight is available, the „Solar Charge‟ indicator located
at the display panel should automatically turn on and the indicator should either flash or remain
solid depending on the battery status.
NOTE: It is recommended to always charge the internal battery to a 100% state-of-charge, as
shown by a steady green on “Solar Charger” indicator.
Connect to non-NATURE POWER Solar Panel:
The Solar Input port located at the back of the unit comes with PP45 Anderson Powerpole
connectors. To connect a non-NATURE POWER Solar Panel to the Solar Home and RV Kit
System, use the supplied cable and make your own wire connection to your solar panel through
the two bare wire ends. Please double check on the polarity before connected. The red connector
is used to connect to the positive terminal of the Solar Home and RV Kit System and the white
connector is used to connect to the negative (ground) terminal of the Solar Home and RV Kit.
CAUTION: Reverse polarity. Improper connections (reversing the wire connection on the
solar panel connection box or the connector wiring) will cause the unit to malfunction and may
permanently damage the unit. Damage caused by a reverse polarity connection is not covered
by your warranty.
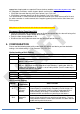
If you want to make your own connector on your solar panel cable, the following parts and the
Solar
Input