PXI PXI™-1000 User Manual PXI-1000 User Manual January 1998 Edition Part Number 321710B-01
Internet Support E-mail: support@natinst.com FTP Site: ftp.natinst.com Web Address: http://www.natinst.
Important Information Warranty The PXI-1000 is warranted against defects in materials and workmanship for a period of one year from the date of shipment, as evidenced by receipts or other documentation. National Instruments will, at its option, repair or replace equipment that proves to be defective during the warranty period. This warranty includes parts and labor.
Compliance FCC/DOC Radio Frequency Interference Class A Compliance This equipment generates and uses radio frequency energy and, if not installed and used in strict accordance with the instructions in this manual, may cause interference to radio and television reception. Classification requirements are the same for the Federal Communications Commission (FCC) and the Canadian Department of Communications (DOC).
For Your Safety ! Caution Before undertaking any troubleshooting, maintenance, or exploratory procedure, read carefully the WARNING and CAUTION notices. This equipment contains voltage hazardous to human life and safety, and is capable of inflicting personal injury. • Mainframe Grounding—The PXI-1000 mainframe requires a connection from the premise wire safety ground to the PXI-1000 chassis ground. The earth safety ground must be connected during use of this equipment to minimize shock hazards.
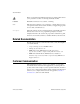
Contents About This Manual Organization of This Manual .........................................................................................xi Conventions Used in This Manual.................................................................................xi Related Documentation..................................................................................................xii Customer Communication .............................................................................................
Contents Cleaning......................................................................................................................... 3-1 Interior Cleaning ............................................................................................. 3-2 Exterior Cleaning ............................................................................................ 3-2 Cleaning the Fan Filters.................................................................................................
Contents Table A-1. Table A-2. Table A-3. Table A-4. Table A-5. Table A-6. Table A-7. AC Input Specifications ........................................................................A-1 DC Output Specifications......................................................................A-2 Cooling Specifications ..........................................................................A-3 Safety Specifications .............................................................................
About This Manual The PXI-1000 User Manual describes the features of the PXI-1000 mainframe and contains information about configuring the mainframe, installing the modules, and operating and using the PXI-1000. Organization of This Manual This manual is organized as follows: • Chapter 1, Getting Started, describes the key features of the PXI-1000, lists the contents of your kit, and lists optional equipment you can order from National Instruments.
About This Manual This icon to the left of bold italicized text denotes a warning, which advises you of precautions to take to avoid being electrically shocked. bold italic Bold italic text denotes a note, caution, or warning. italic Italic text denotes emphasis, a cross reference, or an introduction to a key concept. This font also denotes text from which you supply the appropriate word or value, as in Windows 3.x.
1 Getting Started This chapter describes the key features of the PXI-1000, lists the contents of your kit, and lists optional equipment you can order from National Instruments. Unpacking Carefully inspect the shipping container and the mainframe for damage. Check for visible damage to the metal work. Check to make sure all handles, hardware, and switches are undamaged. Inspect the inner chassis for any possible damage, debris, or detached components.
Chapter 1 Getting Started Table 1-1. Power Cables (Continued) Power Cable Reference Standards Universal Euro 240 V CEE (7), II, IV, VII IEC83 North America 240 V ANSI C73.20/NEMA 5-15-P/IEC83 United Kingdom 240 V BS 1363/IEC83 If you are missing any of the above items or if you have the incorrect power cord, contact National Instruments. Optional Equipment An optional rack-mount kit is available from National Instruments.
Chapter 1 Getting Started • Selectable fan speed for maximum cooling or quiet operation • Carrying handle for portability • Tilt feet for bench-top applications PXI-1000 Backplane Overview Interoperability with CompactPCI The PXI-1000 backplane is interoperable with PXI-compatible products and standard CompactPCI products. This is an important feature, as many PXI-compatible systems may not require components that do not implement PXI-specific features.
Chapter 1 Getting Started 1 ON STANDBY 22 P2 1 25 2 P1 1 ZABCDEF 1 2 7 6 3 4 5 6 7 8 5 3 4 8 4 3 1 Remote On/Off (Standby) Switch 3 Optional Mounting Brackets 6 Star Trigger Slot 2 Backplane Connectors (Located in Slots 1-8) 4 Removable Feet 7 System Controller Slot 5 Peripheral Slots 8 Controller Expansion Slots Figure 1-1.
Chapter 1 1 2 Getting Started 3 90-264 VAC 47-63 HZ 8A MAX CB1 10A HI DISCONNECT POWER CORD BEFORE REMOVING POWER MODULE LO FAN SPEED DB-9 7 6 5 4 1 Module Cooling Air Outlets 3 Main Power Switch 5 Chassis Ground Screw 2 Universal AC Input Circuit Breaker Remote Power Status and Inhibit Connector 4 6 7 Fan Speed Selector Figure 1-2.
Chapter 1 Getting Started Local Bus The PXI backplane’s local bus is a daisy-chained bus that connects each peripheral slot with its adjacent peripheral slots to the left and right, as shown in Figure 1-3. For example, a given peripheral slot’s right local bus connects to the adjacent slot’s left local bus and so on. Each local bus is 13 lines wide and can pass analog signals between cards or provide a high-speed side-band communication path that does not affect the PXI bandwidth.
Chapter 1 Getting Started operations performed on other modules in the system. Modules can pass triggers to one another, allowing precisely timed responses to asynchronous external events the system is monitoring or controlling. System Reference Clock The PXI-1000 supplies the PXI 10 MHz system clock signal (PXI_CLK10) independently to each peripheral slot.
Installation and Configuration 2 This chapter describes how to prepare and operate your PXI-1000 mainframe. Before connecting the mainframe to a power source, read this chapter and the For Your Safety section located at the beginning of this manual. Site Considerations The PXI-1000 is designed to operate on a bench or in an instrument rack. Determine how you want to use your PXI-1000 and follow the appropriate installation instructions.
Chapter 2 Installation and Configuration 1 2 1 Module Cooling Air Outlets 2 Module Cooling Air Intake Figure 2-1. PXI-1000 Mainframe Airflow Side View Install your mainframe so that you can easily access the rear panel. This simplifies the replacement of the air filters or power supply/fan assembly, if necessary. Rack Mounting Rack-mount applications require the optional rack-mount kit available from National Instruments.
Chapter 2 Installation and Configuration Connecting Safety Ground Warning The PXI-1000 chassis is designed with a three-position NEMA 15-5 style plug that connects the ground line to the chassis ground. To minimize shock hazard, make sure your electrical power outlet has an appropriate earth safety ground that is connected whenever you power up the chassis.
Chapter 2 ! Installation and Configuration Caution When connecting digital voltmeter probes to the rear D-sub connector, be careful not to short the probe leads together. Doing so could damage the power supply. You can use a digital voltmeter to ensure all voltage levels in your PXI-1000 are within the allowable limits. Referring to Table 2-1, connect one lead of the voltmeter to a supply pin on the remote power monitoring connector (9-pin D-sub) located on the rear panel.
Chapter 2 Installation and Configuration Remote Power Monitoring and Inhibiting Interface The PXI-1000 mainframe supports remote power monitoring and inhibiting via a 9-pin D-sub connector located on the rear panel. Table 2-2 shows the pinout of the DB-9 connector. Table 2-2. DB-9 Connector Pinout DB-9 Pin Signal 1 Logic Ground 2 +5 V 3 Reserved 4 +3.
Chapter 2 Installation and Configuration Installing PXI Modules ! Turn off the mainframe power before installing CompactPCI or PXI modules. Caution Install a module into a mainframe slot by first placing the module’s card edges into the front module guides (top and bottom), as shown in Figure 2-2. Slide the module to the rear of the mainframe (making sure that the injector/ejector handle is pushed down as shown in Figure 2-3).
Chapter 2 Installation and Configuration Figure 2-3. Injector/Ejector Handle Position during Module Insertion Installing Filler Panels To optimize module cooling performance, install filler panels into unused or empty slots. Secure with the captive mounting screws. Using the Chassis Initialization File To assist system integrators, the PXI specification requires manufacturers of PXI chassis and system modules to document the capabilities of their products.
3 Maintenance This chapter describes basic maintenance procedures you can perform on the PXI-1000 mainframe. Service Interval Clean the mainframe fan filters at a maximum interval of six months. Depending upon the amount of use and ambient dust levels in the operating environment, the filters may require more frequent cleaning. Clean dust from the mainframe exterior (and interior) as needed, based on the operating environment. Periodic cleaning increases reliability.
Chapter 3 Maintenance Interior Cleaning Use a dry, low-velocity stream of air to clean the interior of the mainframe. Use a soft-bristle brush for cleaning around components. If you must use a liquid for minor interior cleaning, use a 75% isopropyl alcohol solution and rinse with deionized water. Exterior Cleaning Clean the exterior surfaces of the mainframe with a dry lint-free cloth or a soft-bristle brush. If any dirt remains, wipe with a cloth moistened in a mild soap solution.
Chapter 3 Maintenance Resetting the AC Mains Circuit Breaker If your PXI-1000 encounters an over-current condition, the circuit breaker located on the rear panel will trip to prevent damage to the mainframe. Complete the following steps to reset the circuit breaker: 1. Turn the front panel (remote) power switch to the Standby position. 2. Turn off the rear main power switch. 3. Depress the circuit breaker to reset it. 4. Turn on the rear main power switch. 5.
Chapter 3 Maintenance Troubleshooting the PXI-1000 Refer to Table 3-1 to troubleshoot the PXI-1000 mainframe. The table lists possible causes for power failure and recommends ways to correct the problem. Table 3-1. Troubleshooting PXI-1000 User Manual Possible Cause What to Do PXI-1000 mainframe is not connected to power source. Make sure that the PXI-1000 is connected to a live electrical outlet. Try operating another piece of equipment from this outlet. Power switches are not switched on.
A Specifications This appendix contains complete specifications for the PXI-1000 mainframe. Electrical Table A-1. AC Input Specifications Characteristic © National Instruments Corporation Description Input Voltage Range 90–264 VAC Input Frequency Range 47 to 63 Hz Over-Current Protection 10 A circuit breaker Operating Current 8A Line Regulation ± 0.5% over operating line range, all outputs Efficiency 80% typical Transient Response Output maximum excursion of ±5% for 25% load step.
Appendix A Specifications Table A-2. DC Output Specifications Characteristic PXI-1000 User Manual Description Maximum Usable Power 300 W DC Current Capacity (IMP) Voltage IMP (Steady-State Current) +3.3 V 40 A +12 V 4A +5 V 20 A –12 V 1A Load Regulation 1% for 10% to 100% load changes, all outputs 10% min. load required on V1 (+3.3 V) for max. load regulation on outputs V2 (+5 V), V3 (+12 V), and V4 (–12 V).
Appendix A Specifications Cooling Table A-3.
Appendix A Specifications Environmental Table A-5.
Appendix A Specifications Backplane Table A-6. Backplane Specifications Characteristic © National Instruments Corporation Description Size 3U-sized; one system slot (with three system expansion slots) and seven peripheral slots. Compliant with IEEE 1101.10 mechanical packaging. PXI Specification Revision 1.0 compliant. Accepts both PXI and CompactPCI (PICMG 2.0 R2.1) 3U modules. Backplane Bare-Board Material UL 94 V-0 recognized (File No.
Appendix A Specifications Mechanical Table A-7. Mechanical Specifications Characteristic Description Overall Dimensions Standard Mainframe Height Width Depth 17.78 cm (7.00 in.) 27.02 cm (10.64 in.) 37.85 cm (14.90 in.) Notes: 1.80 cm (.71 in.) added to height when feet are installed. When tilted with front feet extended on table top, height is increased approximately 5.29 cm (2.083 in.) in front and 1.48 cm (.583 in.) in rear. Weight 8.6 kg (19 lb.) Maximum Module Weight 1.8 kg (4 lb.
Appendix A Specifications Figure A-1 shows the PXI-1000 dimensions. The holes shown are for the installation of the optional rack-mount kit. You can install this kit on the front or rear of the chassis, depending on which end of the chassis you wish to face toward the front of the instrument cabinet. Note that the front and rear chassis mounting holes (size M4) are symmetrical. ON STANDBY 7.00 in. 1 2 3 4 5 6 7 8 10.64 in. 14.90 in. 1.823 in. .78 in. 1.00 in. 3.541 in. 1.844 in. .71 in.
B Pinouts This appendix describes the P1 and P2 connector pinouts for the PXI-1000 backplane. Table B-1 shows the P1 (J1) connector pinout for the System Controller slot. Table B-2 shows the P2 (J2) connector pinout for the System Controller slot. Table B-3 shows the P1 (J1) connector pinout for the Star Trigger slot. Table B-4 shows the P2 (J2) connector pinout for the Star Trigger slot. Table B-5 shows the P1 (J1) connector pinout for the peripheral slots.
Appendix B Pinouts Table B-1. P1 (J1) Connector Pinout for the System Controller Slot Pin Z A B C D E F 25 GND 5V REQ64# ENUM# 3.3V 5V GND 24 GND AD[1] 5V V(I/O) AD[0] ACK64# GND 23 GND 3.3V AD[4] AD[3] 5V AD[2] GND 22 GND AD[7] GND 3.3V AD[6] AD[5] GND 21 GND 3.3V AD[9] AD[8] M66EN C/BE[0]# GND 20 GND AD[12] GND V(I/O) AD[11] AD[10] GND 19 GND 3.3V AD[15] AD[14] GND AD[13] GND 18 GND SERR# GND 3.3V PAR C/BE[1]# GND 17 GND 3.
Appendix B Pinouts Table B-2.
Appendix B Pinouts Table B-3. P1 (J1) Connector Pinout for the Star Trigger Slot Pin Z A B C D E F 25 GND 5V REQ64# ENUM# 3.3V 5V GND 24 GND AD[1] 5V V(I/O) AD[0] ACK64# GND 23 GND 3.3V AD[4] AD[3] 5V AD[2] GND 22 GND AD[7] GND 3.3V AD[6] AD[5] GND 21 GND 3.3V AD[9] AD[8] M66EN C/BE[0]# GND 20 GND AD[12] GND V(I/O) AD[11] AD[10] GND 19 GND 3.3V AD[15] AD[14] GND AD[13] GND 18 GND SERR# GND 3.3V PAR C/BE[1]# GND 17 GND 3.
Appendix B Pinouts Table B-4.
Appendix B Pinouts Table B-5. P1 (J1) Connector Pinout for the Peripheral Slot Pin Z A B C D E F 25 GND 5V REQ64# ENUM# 3.3V 5V GND 24 GND AD[1] 5V V(I/O) AD[0] ACK64# GND 23 GND 3.3V AD[4] AD[3] 5V AD[2] GND 22 GND AD[7] GND 3.3V AD[6] AD[5] GND 21 GND 3.3V AD[9] AD[8] M66EN C/BE[0]# GND 20 GND AD[12] GND V(I/O) AD[11] AD[10] GND 19 GND 3.3V AD[15] AD[14] GND AD[13] GND 18 GND SERR# GND 3.3V PAR C/BE[1]# GND 17 GND 3.
Appendix B Pinouts Table B-6.
Customer Communication C For your convenience, this appendix contains forms to help you gather the information necessary to help us solve your technical problems and a form you can use to comment on the product documentation. When you contact us, we need the information on the Technical Support Form and the configuration form, if your manual contains one, about your system configuration to answer your questions as quickly as possible.
Fax-on-Demand Support Fax-on-Demand is a 24-hour information retrieval system containing a library of documents on a wide range of technical information. You can access Fax-on-Demand from a touch-tone telephone at 512 418 1111. E-Mail Support (Currently USA Only) You can submit technical support questions to the applications engineering team through e-mail at the Internet address listed below. Remember to include your name, address, and phone number so we can contact you with solutions and suggestions.
Technical Support Form Photocopy this form and update it each time you make changes to your software or hardware, and use the completed copy of this form as a reference for your current configuration. Completing this form accurately before contacting National Instruments for technical support helps our applications engineers answer your questions more efficiently.
PXI-1000 Hardware Configuration Form Record the settings and revisions of your hardware and software on the line to the right of each item. Complete a new copy of this form each time you revise your software or hardware configuration, and use this form as a reference for your current configuration. Completing this form accurately before contacting National Instruments for technical support helps our applications engineers answer your questions more efficiently.
Other Products List and describe all devices installed in your mainframe.
Documentation Comment Form National Instruments encourages you to comment on the documentation supplied with our products. This information helps us provide quality products to meet your needs. Title: PXI ™-1000 User Manual Edition Date: January 1998 Part Number: 321710B-01 Please comment on the completeness, clarity, and organization of the manual.
Glossary Prefix Meanings Value n- nano- 10 –9 µ- micro- 10 – 6 m- milli- 10 –3 c- centi- 10 –2 k- kilo- 10 3 M- mega- 10 6 Symbols ° Degrees. ≥ Equal or greater than. ≤ Equal or less than. % Percent. A A Amperes. AC Alternating current. ANSI American National Standards Institute. AWG American Wire Gauge. B backplane An assembly, typically a printed circuit board, with connectors and signal paths that bus the connector pins.
Glossary C C Celsius. cfm Cubic feet per minute. CFR Cooperative Fuel Research. CSA Canadian Standards Association. D daisy-chain A method of propagating signals along a bus, in which the devices are prioritized on the basis of their position on the bus. DC Direct current. E ECL Emitter-coupled logic. EIA Electronic Industries Association. EMC Electromagnetic Compatibility. F FCC Federal Communications Commission. G g 1) grams 2) A measure of acceleration equal to 9.8 m/s 2.
Glossary H Hz Hertz; cycles per second. I IEC International Electrotechnical Commission; an organization that sets international electrical and electronics standards. IEEE Institute of Electrical and Electronics Engineers. IMP Mainframe peak current. in. Inches. L lb Pounds. M m Meters. MTBF Mean time between failure. MTTR Mean time to repair. N NEMA National Electrical Manufacturers Association. P PXI PCI eXtensions for Instrumentation. R RH Relative humidity.
Glossary RMS Root mean square. A method used to measure electrical output in volts and watts. S s Seconds. ST Star Trigger. Star Trigger slot This slot is located at slot 2 and has a dedicated trigger line between each peripheral slot. Use this slot for a module with ST functionality that can provide individual triggers to all other peripherals. System controller A module configured for installation in Slot 0 of a VXIbus mainframe.
Index A D AC input (table), A-1 AC mains power connecting to, 2-3 to 2-4 resetting circuit breaker, 3-3 air cooling. See cooling.
Index I precautions before cleaning, 3-1 preparation, 3-1 resetting AC mains circuit breaker, 3-3 service interval, 3-1 static discharge damage (caution), 3-1 troubleshooting, 3-4 mechanical specifications, A-6 to A-7 Inhibit signal, turning off power supply outputs, 2-5 installation and configuration, 2-1 to 2-7 chassis initialization file, 2-7 connecting safety ground, 2-3 connecting to AC mains power, 2-3 to 2-4 filler panel installation, 2-7 module installation, 2-6 to 2-7 CompactPCI or PXI module (f
Index S power supply remote power monitoring and inhibit interface, 2-5 universal, 2-3 voltages at power monitoring connector (DB-9) (table), 2-4 power up, testing, 2-3 to 2-4 PXI-1000 cooling air intake (figure), 2-2 dimensions (figure), A-7 features, 1-2 to 1-3 front view (figure), 1-4 installation (See installation and configuration) maintenance (See maintenance of PXI-1000) optional equipment, 1-2 power cables required (table), 1-1 to 1-2 rear view (figure), 1-5 requirements for getting started, 1-1 t