
Computer Accessories User Manual

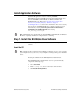
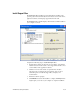

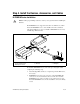
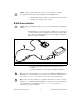
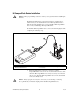
Table Of Contents
- NI-DAQmx Base 3.x Getting Started Guide
- Contents
- Conventions
- Related Documentation
- Overview
- Operating System, Application Software, Programming Language, and Device Support in NI-DAQmx Base 3.x
- Install Application Software
- Step 1. Install the NI-DAQmx Base Software
- Step 2. For Devices Using the LabVIEW 8.5 PDA Module for Windows Mobile Only-Run the PDA Setup Utility
- Step 3. Unpack the Devices, Accessories, and Cables
- Step 4. Install the Devices, Accessories, and Cables
- Step 5. Confirm That Your Device Is Recognized
- Step 6. Create and Configure Tasks
- Documentation
- Getting Started Developing an Application
- Where to Go for Support
NI-DAQmx Base Getting Started Guide 8 ni.com
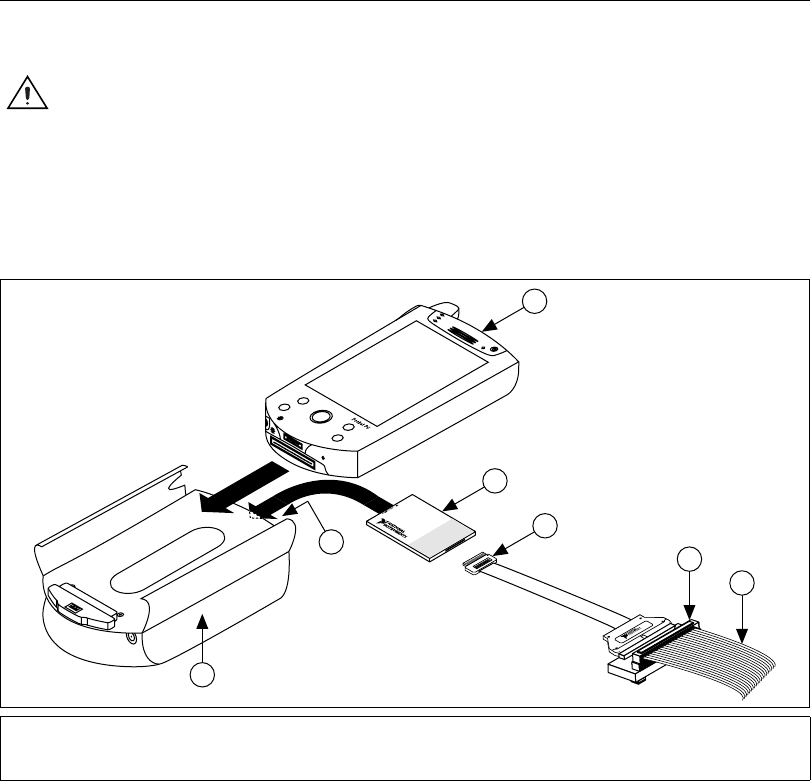
Step 4. Install the Devices, Accessories, and Cables
NI PCMCIA Device Installation
Caution Follow proper ESD precautions to ensure you are grounded before installing the
hardware.
The NI PCMCIA device supports hot insertion on a PDA device, which
means the NI PCMCIA device can be installed and removed without
rebooting the PDA device. You can install an NI PCMCIA device in any
available Type II PC Card slot.
To install the NI PCMCIA device, refer to the preceding figure while
completing the following steps.
1. Attach the Type II PC cardsleeve or expansion pack to the PDA device,
if necessary.
2. NI PCMCIA devices have two connectors: a 68-pin PCMCIA bus
connector on one end and an I/O connector on the other end. The
NI PCMCIA device is keyed so that you can only insert it one way.
Insert the NI PCMCIA device in the slot until the connector is firmly
seated.
1 PDA with Type II PC Card Slot
2 Type II PC Card Socket
3 PDA Expansion Pack
4 NI PCMCIA Device
5 I/O Cable
6 Accessory
7 I/O Signals
®
1
2
5
6
DA
QCard-6062
7
4
3