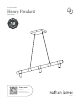
Let’s build the Henry Pendant 5 25 SEMBL Y A S M I N UT E 2 SKU 13501 Scan me! Inspiration Digital Instructions Free Lifetime Warranty 22-1128
Ok, let’s get rolling This should be easy, just follow our instructions and you will be back to Netflix in no time.
Safety first, fun later Safe use of this product starts with you. Do not modify the structure of this product in any way. Use this pendant responsibly with the primary concern for your safety. Follow assembly instructions carefully and inspect product upon receipt and each use. Our products have been tested to meet specific safety measures as they were originally intended to be sold.
The goods 1 A B C D IMPORTANT 1. Do not tighten bolts / screws completely until all bolts / screws are lined up and inserted into holes. 2. Do not over tighten screws and bolts to avoid stripping. 3. Please use hand tools to assemble this product. Do not use power tools.
Pre-Installation • Read all instructions prior to beginning assembly. • To avoid damaging this product, assemble it on a soft, non-abrasive surface such as carpet or cardboard. • Keep the receipt and these instructions for proof of purchase. • 120V 60Hz AC Only • Suggested Bulb: G25 LED 60 Watt Equivalent | E26 Medium Base | Dimmable • Max. Wattage: 180W (60W per bulb) Step 1 Let’s get this thing fired up! Or should we say lit? Remove screws from Mounting Plate.
Step 2 Install Mounting Plate to your pre-installed Electrical Box using two M4*26mm Screws (A). Note: Be sure that you are only making the connections to a 120V AC 60Hz circuit. If you do not have a pre-existing electrical box, we strongly advise using a certified electrician.
Step 3 Loosen set screws at the top of the Fixture (1). This will allow you to set your desired cord length & fixture height. 1 If you’re hanging this pendant light in your kitchen, we suggest hanging it between 30 and 36 inches from your countertop or island. If you’re hanging this pendant light above your dining table, we suggest hanging it between 30 and 34 inches from the top of your table. Thread excess cord length through the plastic cord stay. 7 When desire length is achieved, pull to tighten.
Step 4 Once you set your desired cord length, make sure both cords are the same length before resecuring the set screws. P.S. We aren’t judging you if you’ve already pulled out your snack. Ours was eaten by Step 2.
Step 5 Wrap the ground wire from the Fixture (1) around the grounding screw on the Mounting Bracket and secure with a screw driver.
Step 6 Use a Wire Nut (B) to join the ground wire from the Fixture (1) with the ground wire from the Electrical Box.
Step 7 Use the Wire Nuts (B) to join the remaining matching colored wires (White to White, Black to Black). Once complete, tuck the excess wire into the Electrical Box.
Step 8 Secure the Fixture (1) to the Mounting Plate on your preinstalled Electrical Box using the screws that you originally removed in Step 1.
Step 9 Now all that’s left is to install your light bulbs! We suggest using 3 Type G25 bulbs with a maximum wattage of 60W per bulb. Let there be light! Use 3 Type G25 LED 60 watt equivalent bulbs (not included) 120V 60HZ only Troubleshooting Problem Possible Causes Solutions The bulb will not light. The bulb is burned out. Replace the light bulb. The power is off. Ensure the power supply is on. The circuit breaker is off. Ensure the circuit breaker is in the ON position.
Questions? Don’t worry, we’ve got the answers What other light bulbs can fit in this light? Is this light compatible outside North America? The bulb must not be greater than the max wattage for the fixture. It must match the base size, and the diameter of any area of the bulb should be less than diameter of any area of shade, so that it can fit. Our lighting is only warranted in Canada and the United States.
No heartburn, when we handle the return Give us a call 1-866-619-1004 or shoot us a message at help@nathanjames.com we will issue you a free replacement with zero hassle. Our way Their way Give us a call Re-package item Replacement Schedule pick up You Track package Replacement You We really don’t want you to go through the hassle of re-packaging your item and sending it back, because let’s be honest…nobody has time for that.
We are only in business if you’re happy For starters, thanks for being you. Toll-free at 1-866-619-1004 Help@nathanjames.com NathanJames.com/help We do our best to ensure your product arrives without any problems, but occasionally mistakes happen—as humans we are imperfect beings. In the event that a part is damaged or missing, we will be more than happy to provide you with replacement part(s) for free. Warranty This product comes with a lifetime warranty from the date of purchase.