Using your R NAPCO FREEDOM F-TPG Garage Touchpad Home Security System © NAPCO 2005 F-TPG_OI309.06_USER_anch...
INTRODUCTION Congratulations on your purchase of a new Freedom Garage Door Security System. This revolutionary new concept in residential security makes using your system easier than ever before possible, because the system uses its computerized control panel to continually monitor the status of your garage door.
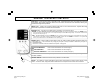
T AB L E O F C O N T E N T S TABLE OF CONTENTS INTRODUCTION ..............................................................................2 TESTING THE SYSTEM ..................................................................2 GARAGE TOUCHPAD INDICATORS ..............................................4 GARAGE TOUCHPAD CONTROLS ................................................5 ARMING WHEN LEAVING ...............................................................6 BYPASSING FAULTED ZONES ..........................
G AR AG E T O U C H P AD I N D I C A T O R S The green READY light shows the status of the zones in your system: ON indicates that all zones are secure and the system is ready to be armed. FLASHING indicates that at least one zone is open. To determine the open zone, count the number of flashes and refer to the zone list on your security panel. OFF indicates that the optional second deadbolt is not locked.
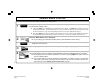
G AR AG E T O U C H P AD C O N T R O L S STAY Button - Press to arm system in the STAY mode. Perimeter devices such as windows and doors will be protected, while interior protective devices such as motion sensors will be de-activated, allowing free movement throughout the premises. AWAY Button - Press to arm system in AWAY mode when no one is to remain home. System will be fully armed with all perimeter and interior devices activated.
A R M I N G W H E N L E AV I N G If you are leaving with NO other family members remaining home: 1 READY Check the Garage Touchpad indicators. The green READY light should be ON-STEADY, indicating that the system is ready to arm. • • If the green READY light is BLINKING, this indicates that a zone is faulted. The READY light is blinking out the zone number of the open zone. Count the flashes and look at your zone list to see which zone is open and secure it (close the door or window, etc.).
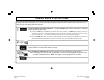
B Y P AS S I N G F A U L T E D Z O N E S If you are trying to arm with a faulted zone or zones, the green READY light will be blinking out the number of the faulted zones. If you cannot repair the zone(s), they may be temporarily removed from the system, or bypassed, using the following procedure: Press the BYPASS button. 1 TBL The Garage Touchpad will beep and the yellow Trouble indicator will light ON STEADY. 2 Press either the STAY or AWAY button. 3 4 If arming AWAY, open the garage door and exit.
A R M I N G W H E N S T AY I N G H O M E Arming in the Stay mode allows you to remain home with the perimeter protection active and the interior protection off, so that you may move freely about the premises. 1 READY Check the Garage Touchpad indicators. The green READY light should be ON-STEADY, indicating that the system is ready to arm. • • If the green READY light is BLINKING, this indicates that a zone is faulted. The READY light is blinking out the zone number of the open zone.
A R M I N G AN D L E AV I N G W I T H O T H E R S S T A Y I N G If you are arming and leaving with other family members remaining home: 1 READY Check the Garage Touchpad indicators. indicating that the system is ready to arm. The green READY light should be ON-STEADY, • If the green READY light is BLINKING, this indicates that a zone is faulted. The READY light is blinking out the zone number of the open zone.
E X I T I N G W I T H T H E S Y S T E M AL R E A D Y A R M E D If the system is Armed STAY and you are leaving with other family members remaining home: Press the STAY button on the Touchpad. 1 ARMED STAY The ARMED indicator will light and STAY will begin to flash, indicating that you have up to 3 minutes to exit through the garage and close the door. 2 Open the garage door from the inside. System will disarm. 3 4 Exit the garage.
E X I T I N G W I T H T H E S Y S T E M AL R E A D Y A R M E D If the system is Armed STAY and you are leaving with NO other family members remaining home: Press the AWAY button on the Touchpad. 1 ARMED The ARMED indicator will begin to flash, indicating that you have up to 3 minutes to exit through the garage and close the door. 2 Open the garage door from the inside. System will disarm. 3 4 Exit the garage. F-TPG_OI309.06_USER_anch...
EMERGENCY BUTTONS Emergency Buttons (Only available if programmed). The Emergency Buttons, if programmed, are always active, whether the system is armed or disarmed. The Emergency Button must be Held Down for 3 seconds to activate the emergency alarm and transmit the signals to central station. Police Emergency Hold down the Police Emergency button to alert the central station of a police emergency.
D I S AR M I N G T H E S Y S T E M DISARMING WHEN RETURNING HOME: When returning home, opening your garage door (by pressing A1 or A2 on your Keyfob) from the outside will automatically disarm the system. The red ARMED light will go out and the green READY light will turn on. If an alarm has occurred while you were away, the red ARMED light will be flashing and the F-TPG Touchpad sounder will be active.
S I L E N C I N G A N AL AR M If an alarm occurs while you are at home: ARMED The Garage Touchpad siren will sound and the red ARMED light will flash. Proceed with caution! If you suspect that an intruder may still be in the premises, leave immediately and call authorities from a neighbor's telephone. To silence the alarm, insert your F-IFOB key into the IFOB slot on the Garage Touchpad and remove when alarm has silenced.
FIRE PROTECTION* If a fire is detected, the siren will sound a distinct pulsating tone and the FIRE indicator on the Garage Touchpad will be flashing. If a Fire Alarm does occur: FIRE 1 2 If a fire is in progress, evacuate the premises immediately! Call the Fire Department from an outside phone. If there is no evidence of a fire, press SILENCE OR insert your F-IFOB key into the Garage Touchpad. The siren will silence, and FIRE on the Garage Touchpad will stop flashing, and light steady.
FIRE PROTECTION Preparing a Fire Escape Plan Even with the most advanced fire alarm system, adequate protection requires an escape plan. To prepare your plan, draw floor plans of your building. Show two exits - a front or back door and a window from each room. (Make sure the window works. You may need a special fire-escape ladder if the window is high up). Write down your outside meeting place. Family Rehearsal Rehearse each of the following activities: 1. Everyone in his room with the doors closed. 2.
SYSTEM TROUBLE ERROR CODES Your Freedom Alarm System is constantly monitoring its own components, as well as all critical services, such as AC power and the telephone line, to insure that it is always ready to provide the protection for which it was designed. When a system trouble occurs, the Garage Touchpad will caution you with a Trouble TBL light and a beeping sounder. If you cannot immediately fix the trouble, the system can still be used.
SYSTEM TROUBLE ERROR CODES TBL Flashes / Touchpad beeps 6 READY Flashes NONE 7 NONE 1 1 2 2 3 1-8 Trouble Condition Lost Key Mode Fire Zone Trouble Action This is a reminder that the system has been put into the lost key mode ([STAY] & [AWAY] pressed simultaneously). While in this mode, the system can only be disarmed with your F-IFOB. When you have replaced or re-keyed your garage door opener, press [STAY] & [AWAY] simultaneously again to exit lost key mode.
ZONE LIST The space below is for recording the descriptions of the zones in your system. • If the system has a faulted zone, count the number of READY light flashes and refer to the list below to see which zone is open and secure it (close the door or window, etc.). • If an alarm has occurred, count the number of ARMED light flashes and refer to the list below to see which zone caused the alarm: ZONE 1 ZONE 2 ZONE 3 ZONE 4 ZONE 5 ZONE 6 ZONE 7 ZONE 8 19 F-TPG_OI309.06_USER_anch...
ENROLLING A NEW F-IFOB The F-IFOB is a uniquely coded digital key which performs the following functions when inserted into the F-IFOB slot on the Garage Touchpad: • Disarm an armed system • Silence an active alarm • Reset a fire alarm The Master F-IFOB supplied with your system will perform all of these functions, plus it may also be used to add up to 5 additional F-IFOBs to the system.
L O S T G AR AG E D O O R O P E N E R M O D E Lost Opener Mode In the event that your garage door remote control (or key that operates your garage door opener) is lost or stolen, the system may still be used by arming in the Lost Garage Door Opener Mode. In Lost Garage Door Opener Mode, the system may be armed as usual, however opening the garage door will not disarm the system. The system may only be disarmed with the F-IFOB digital key.
FEDERAL COMMUNICATIONS COMMISSION (FCC) Part 68 STATEMENT This equipment complies with Part 68 of the FCC rules. On the front cover of this equipment is a label that contains, among other information, the FCC registration number and ringer equivalence number (REN) for this equipment. If requested, this information must be provided to the telephone company. This equipment uses the following jacks: An RJ31 X is used to connect this equipment to the telephone network.
WARNING! THE LIMITATIONS OF THIS ALARM SYSTEM While this system is an advanced design security system, it does not offer guaranteed protection against burglary or fire or other emergency. Any alarm system, whether commercial or residential, is subject to compromise or failure to warn for a variety of reasons. For example: • Intruders may gain access through unprotected openings or have the technical sophistication to bypass an alarm sensor or disconnect an alarm warning device. • Intrusion detectors (e.g.
WARNING! THE LIMITATIONS OF THIS ALARM SYSTEM (Continued) • Even if the system responds to the emergency as intended, however, occupants may have insufficient time to protect themselves from the situation. In the case of a monitored alarm system, authorities may not respond appropriately. • This equipment, like other electrical devices, is subject to component failure. Even though this equipment is designed to last as long as 10 years, the electronic components could fail at any time.
NAPCO LIMITED WARRANTY NAPCO SECURITY SYSTEMS, INC. (NAPCO) warrants its products to be free from manufacturing defects in materials and workmanship for thirty-six months following the date of manufacture. NAPCO will, within said period, at its option, repair or replace any product failing to operate correctly without charge to the original purchaser or user.
written, are either merged herein or are expressly cancelled. NAPCO neither assumes, nor authorizes any other person purporting to act on its behalf to modify, to change, or to assume for it, any other warranty or liability concerning its products. In no event shall NAPCO be liable for an amount in excess of NAPCO's original selling price of the product, for any loss or damage, whether direct, indirect, incidental, consequential, or otherwise arising out of any failure of the product.
THE FOLLOWING STATEMENT IS REQUIRED BY THE FCC RADIO AND TELEVISION INTERFERENCE This equipment has been tested and found to comply with the limits for a Class-B digital device, pursuant to Part 15 of the FCC Rules. These limits are designed to provide reasonable protection against harmful interference in a residential installation.
333 Bayview Avenue Amityville, New York 11701 For Sales and Repairs, (800) 645-9445 For Technical Service, (800) 645-9440 R Publicly traded on NASDAQ Symbol: NSSC © NAPCO 2005 28 F-TPG_OI309.06_USER_anch...