
User's Manual


Trilogy Networx™ Wireless Setup & DL-Windows Configuration Instructions 35
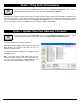
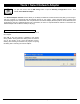
Tools > Import Assigned Lock From Gateway
To open this screen, click the GW Confg button to open the Gateway Configuration screen. Click to
highlight a specific Gateway in the list, then click:
● Tools, Import Assigned Lock From Gateway
● Tools, Import Gateway and Assigned Locks
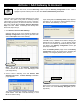
Tools > Import Gateway and Assigned Locks
When the Account information stored in DL-Windows is lost
(such as with a stolen laptop)--AND--the DL-Windows
backup files are either non-existent, inadequate or lost, the
above "Import" options can be used to rebuild an existing
wireless system using the data stored inside the onboard
memory of the installed Gateway device(s).
Although these two options might never be used, their exis-
tence highlights the vital importance of maintaining safe,
secure and up-to-date DL-Windows backup files. The short
period of time it takes to back up your files may save
HOURS of time trying to re-create and re-build your sys-
tem.
Backup your Accounts
On the DL-Windows main screen, click Tools, Backup Ac-
counts, and DL-Windows will copy all Account database
files into a new or existing "Backup" folder. If you accepted
all default selections when installing the DL-Windows soft-
ware, this "Backup" folder will be located in C:\DL-Windows
\Backup. To restore your data, simply copy and paste the
backup files into C:\DL-Windows.
Restoring Data without Backups
If no backups were made for an existing wireless system
and the Account information stored in DL-Windows is lost,
the basic procedure is as follows:
1. Re-install the DL-Windows software.
2. Re-create the Account and all assigned lock Profiles.
In addition, the Global Users screen will need to be
re-populated with all Users.
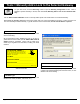
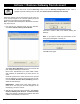
3. Click the GW Confg button, and a popup appears:
Click OK to close the popup, then on the DL-Windows
main screen, click Tools, Set Security Password, and
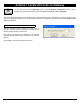
the Set Security Password dialog appears:
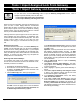
In the Set Security Password dialog, enter the original
"Security Password" used in the original Account, then
click OK to save.
Important: "Security Passwords" are used to differen-
tiate between separate wireless Accounts. Do NOT
share passwords between Accounts, otherwise the radio
signals of separate Accounts can become intermixed.
Be sure you record--in writing--all Account passwords in
a safe location; once set, passwords are NOT retrievable
from DL-Windows!
4. Click the GW Confg button to open the Gateway
Configuration screen.
5. Click Actions, Discover New Gateways. The Gate-
way(s) appear in the Gateway Configuration screen
in green colored text.
6. Click to highlight a specific green-colored Gateway in
the list.
7. Click Tools, Import Gateway and Assigned Locks
to bring in the Gateway settings and all lock serial
number data assigned to that Gateway.
8. In the Gateway Configuration screen, click Tools,
Link / Unlink Lock Profiles.
9. In the Link / Unlink Lock Profiles screen, the lock
serial numbers will be listed in the Available Lock(s)
By Serial Number field, available to be re-linked. Af-
ter linking, a Send Profile to Lock Now popup automati-
cally appears requesting if you wish to send the lock Pro-
files to the physical lock(s).
SET SECURITY PASSWORD DIALOG