
Instruction manual

8.0 Maintenance Guide
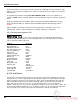
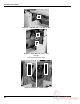
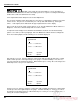
Figure 37
4. Back off the adjusting screw on the side that the trim occurred and tighten the other.
5. With the squaring screws tight, make another test. Continue to adjust and test until no trim
occurs when testing either sequence.
6. Replace the rear plexiglass table cover.
Note: Once the backgauge is square, restore power to the machine and check the backgauge
accuracy (see section 6.12.2.4 on page 26) to make sure it is accurate.
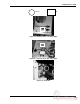
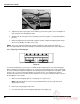
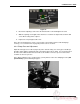
8.4.4 Clamp Pressure Adjustment
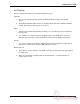
Adjust the clamp pressure reducer (Figure 38) to the desired setting. It is factory preset at 800 psi.
Read the gauge with the clamp down and as the knife begins to move down. Loosen the jam nut on
the valve stem. With an allen wrench, turn the stem clockwise to increase pressure and counter-
clockwise to decrease pressure.
Note: When cutting pressure sensitive paper, you may want to reduce the clamping pressure (400
psi minimum) to prevent marking the paper.
Adjusting
Screws with
Jam Nuts
Clamp
Pressure
Reducer
Figure 38
47