
Instruction manual


6.0 Operation
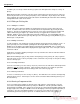
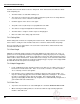
Now press ENTER to begin programming the job. The display should now look similar to the one
shown next:
5.000in # 7
1> _
A) Insert C) Erase
B) Job D) Exit
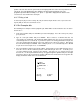
4. To enter the first send value of 8.5”, simply type in 8.5 and press ENTER. The cursor will move to
the second line. Now type 11 and press enter.
5.000in # 7
1> 8.500
2> 11.000
3> _
A) Insert C) Erase
B) Job D) Exit
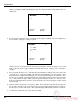
At this point, you could exit and save the job by pressing the soft-key “D” (Exit) to exit to send
mode, or the soft-key “B” (Job) to exit back to the job mode screen. However, lets use this job to
cut paper.
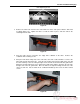
5. Press the down arrow key once. This will remove the blank line 3 and move the cursor to the first
send value (8.5”). Now press SEND. This will move the backgauge to the 8.5” position. Place
the paper to be cut against the backgauge, close the front guard, and press the cut button. Once
the cut cycle is complete, the backgauge will push out the paper and move to the next send value
(11”). Now position the paper again, close the guard, and make another cut. After the cut is
made, the backgauge will push out the stock and return to the first cut position, ready to repeat
the current job.
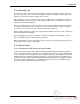
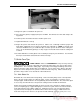
6. Now lets lock the current job so it cannot be edited. First, exit back to job mode by pressing soft-
key “B” (Job). Now move the cursor down to the new job using the down arrow key. Now press
the soft-key “A” (Lock) to lock the job. An asterisk will appear indicating the job has been locked.
7. To exit back to send mode, press the soft-key “D” (Exit).
32