
User manual


Table Of Contents
- Preface
- Emergency first aid
- Manufacturer
- Contents
- Notes, cautions and warnings
- About this guide
- Introduction
- Getting started
- Paper recommendations
- Loading paper
- User authentication and access control
- Operation
- Copying
- Scanning
- Scan to e-mail
- Scan to network PC
- Scan to USB memory
- Scan to local PC
- Scan to remote PC
- Managing profiles
- Managing the address book
- Setting sender and reply to e-mail addresses (from/reply to)
- Creating e-mail templates
- Adding an e-mail address entry to the address book
- Deleting an e-mail address entry from the address book
- Modifying an e-mail address entry from the address book
- Adding a group entry to the address book
- Deleting a group address entry from the address book
- Modifying a group address entry from the address book
- Printing
- Faxing
- Functions common to copy, fax and scan operations
- Maintenance
- Installing upgrades
- Troubleshooting
- Specifications
- Appendix A - menu system
- Index
- Muratec contact details
Maintenance > 106
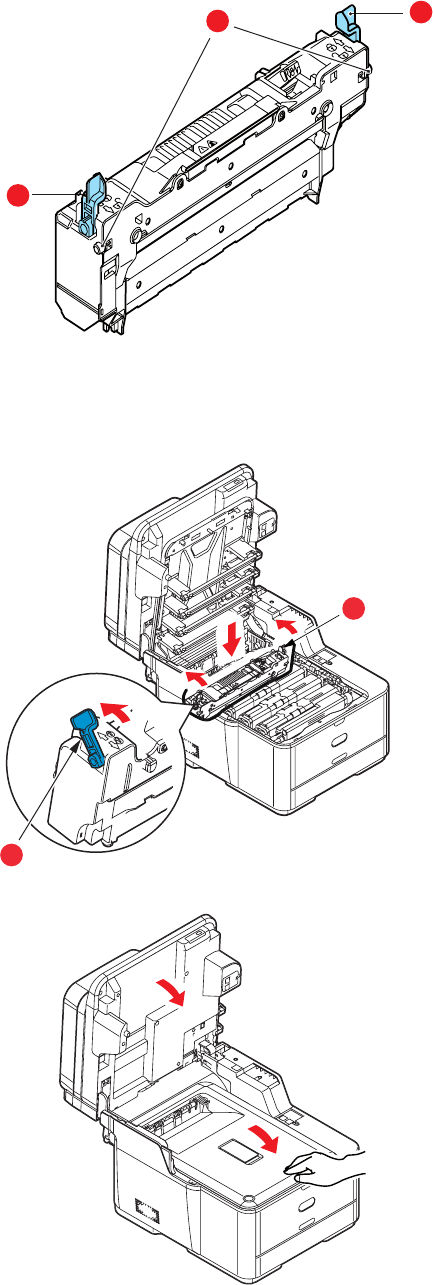
7. Holding the new fuser by its handle, make sure that it is the correct way round. The
retaining levers (b) should be fully upright, and the two locating lugs (c) should be
towards you.
8. Lower the fuser into the printer, locating the two lugs (c) into their slots in the sides
of the printer cavity.
9. Push the two retaining levers (b) towards the rear of the printer to lock the fuser in
place.
10. Close the top cover and press down firmly so that the cover latches closed.
11. Gently lower the scanner.
b
b
c
b
b