
User manual


Table Of Contents
- Preface
- Emergency first aid
- Manufacturer
- Contents
- Notes, cautions and warnings
- About this guide
- Introduction
- Getting started
- Paper recommendations
- Loading paper
- User authentication and access control
- Operation
- Copying
- Scanning
- Scan to e-mail
- Scan to network PC
- Scan to USB memory
- Scan to local PC
- Scan to remote PC
- Managing profiles
- Managing the address book
- Setting sender and reply to e-mail addresses (from/reply to)
- Creating e-mail templates
- Adding an e-mail address entry to the address book
- Deleting an e-mail address entry from the address book
- Modifying an e-mail address entry from the address book
- Adding a group entry to the address book
- Deleting a group address entry from the address book
- Modifying a group address entry from the address book
- Printing
- Faxing
- Functions common to copy, fax and scan operations
- Maintenance
- Installing upgrades
- Troubleshooting
- Specifications
- Appendix A - menu system
- Index
- Muratec contact details
Maintenance > 102
I
MAGE
DRUM
REPLACEMENT
The image drum assembly comes complete with its own installation details which give full
instructions on replacement. You are advised to follow these instructions carefully.
R
EPLACING
THE
TRANSFER
BELT
UNIT
The belt unit is located under the image drum assembly.
Switch off the MFP and allow the fuser to cool for about 10 minutes before opening the
cover. Refer to “Switching off” on page 18 for details.
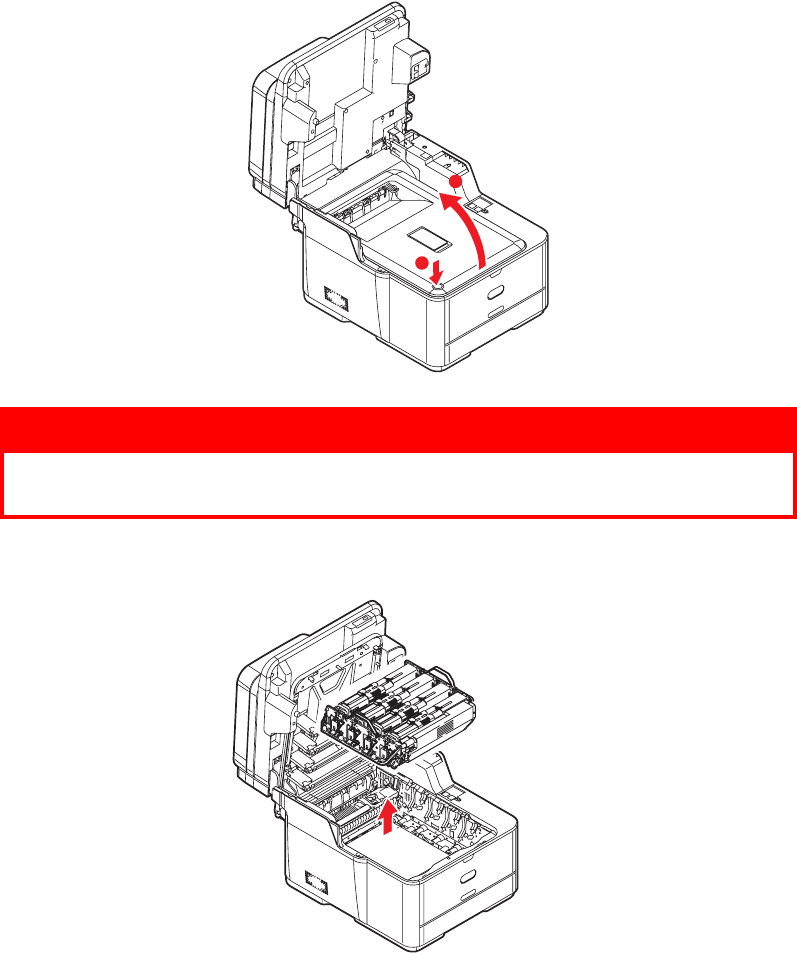
1. Gently raise the scanner.
2. Press the cover release (a) and open the top cover (b) fully.
3. Holding it by its handles, lift the image drum assembly, complete with toner
cartridges, up and out of the printer.
WARNING!
If the MFP has been powered on, the fuser will be hot. This area is
clearly labelled. Do not touch.
a
b