
Installation Guide

9261-8252 Issue 07
Description
Page 7
www.multitone.com
SECTION 4 - INSTALLATION & FITTING
The installation and servicing of this product must only be carried out by suitably qualified personnel.
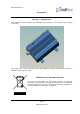
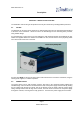
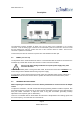
4.1 FITTING
The RPT500 can be wall or shelf mounted. For wall mounting there are two mounting brackets affixed
to the base of the transmitter. Attach the unit to the wall through the four mounting holes provided,
using suitable fixings.
For shelf mounting, remove the four screws affixing the wall mounting brackets and substitute the four
rubber feet supplied. Where this method of installation is used, ensure that the unit is physically stable
once all the leads have been connected.
An earth wire MUST be fitted to the 4mm earth screw terminal on the back of the transmitter, using the
earthing lead supplied, or suitable equivalent.
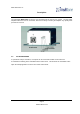
4.2 POWER SUPPLY
The power supply can be wall mounted, using the two holes in the mounting bracket supplied and
suitable fixings. Once the bracket is attached to the wall, fit the power supply to the bracket by feeding
the DC output lead through the square hole in the bracket, from the inside. With the power supply
sitting centrally between the two lugs of the bracket, insert the mains connector into the power supply
through the oval hole, ensuring that it is fully pushed in. This locks the power supply into the bracket.